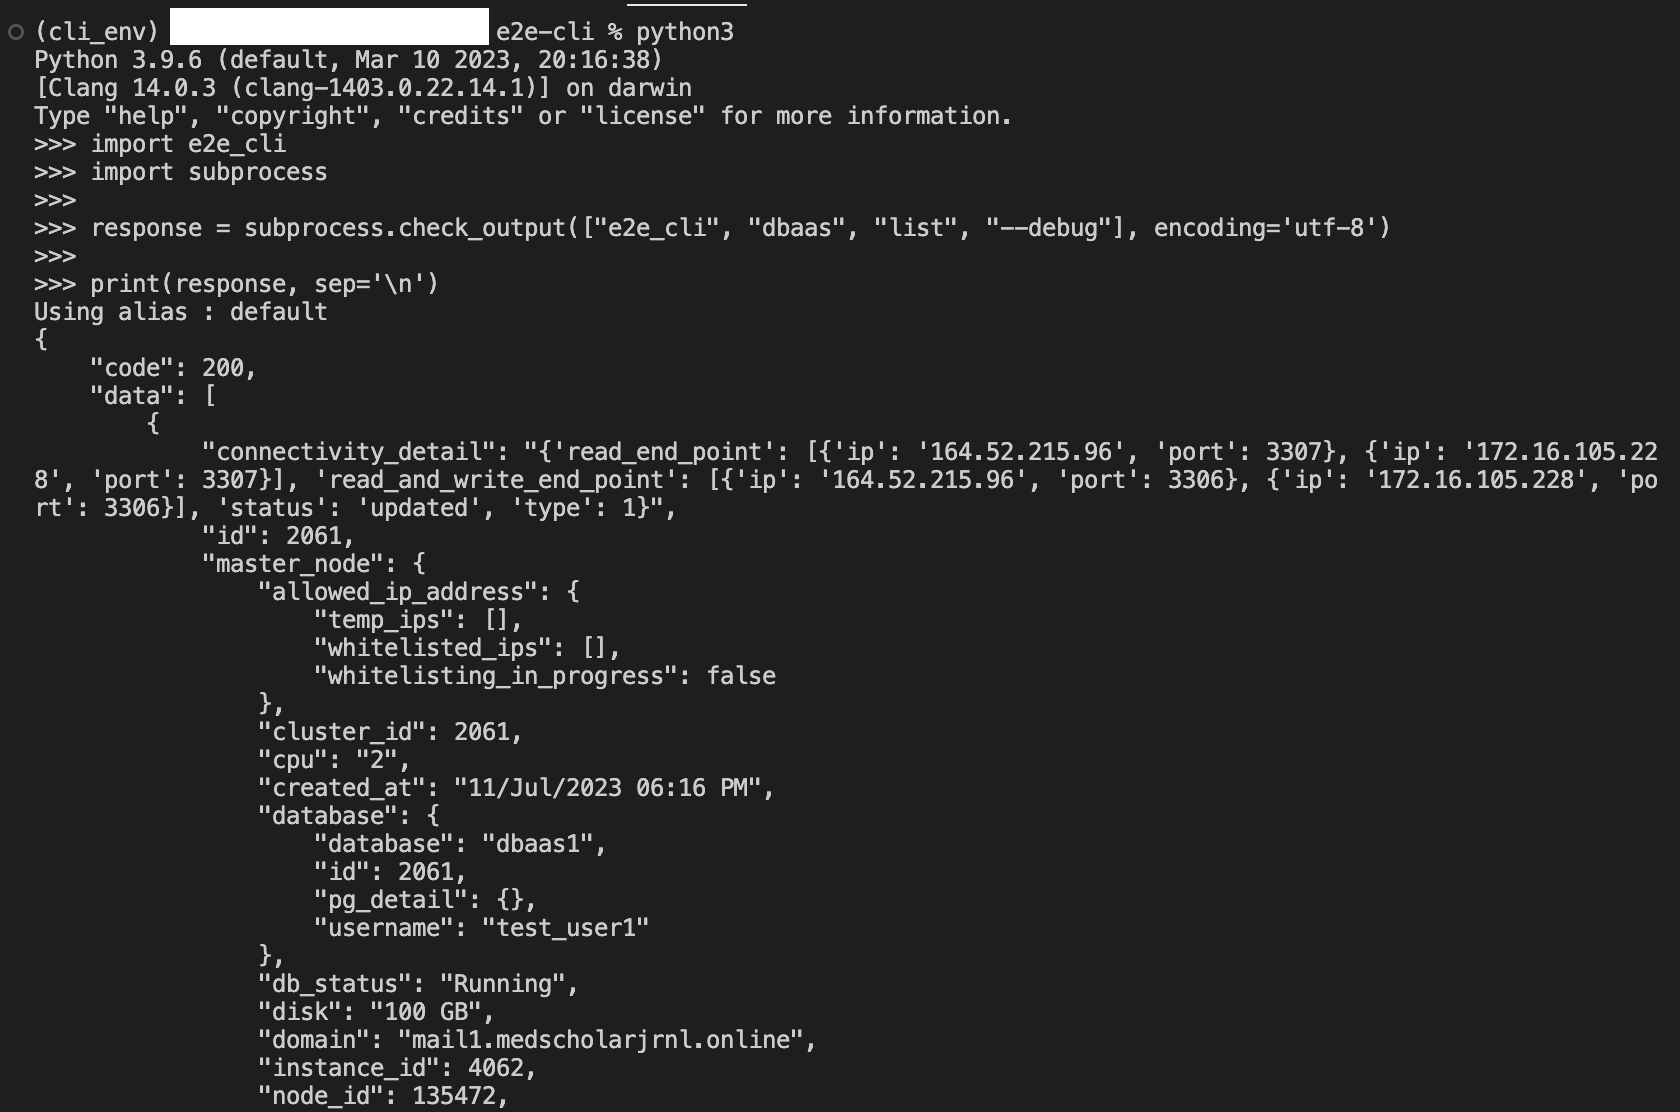
E2E CLI
Introduction
E2E CLI is a command line tool developed by E2E Networks Ltd. Used to access and manage my account/ e2e cloud services from cmd/shell
With the E2E CLI you can convinently operate on Nodes, DBaaS, Buckets as well as on LoadBalancer from command line itself.
Getting Started
How to use E2E CLI
Create API Token
Please go to ‘MyAccount’ and log in using your credentials set up at the time of creating and activating the E2E Networks ‘MyAccount’.
After you log in to the E2E Networks ‘MyAccount’, you can click on the following options.
On the left side of the MyAccount dashboard, click on the “API” section.

Now create/download an API Token, by clicking on the option shown in right-top corner of screen.

Installing E2E CLI on your PC
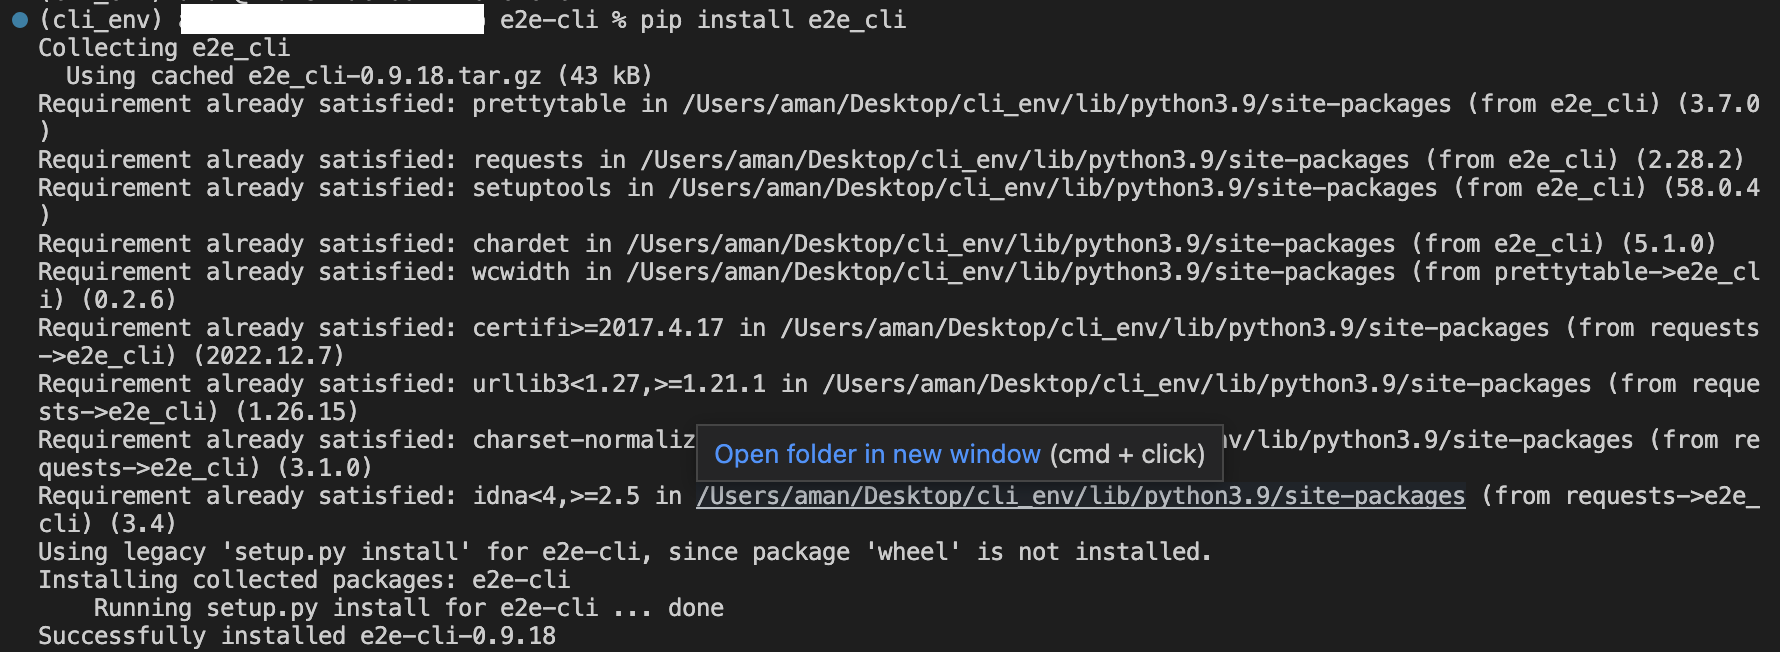
Currently E2E CLI requires python/pip for installation & working on the system Open a terminal on your PC and use the following command :
pip install e2e-cli
Synopsis E2E CLI
Command in E2E CLI are as following :
e2e_cli –alias <command> <subcommand> [inputs/parameters]
E2E CLI Configuration and Setting up
- After completing above two steps, you have to type following on your terminal :
e2e_cli alias add
After this give your API key and Auth Token obtained from e2e MyAccount portal in above previous steps. You can add any number of tokens on your system using above command, just keep alias names different.

Alternatively, you can also add tokens/alias via file downloaded from myAccount UI

E2E CLI viewing user_names/Alias on your system
- you can view all alias/user_name on the system using following command :
e2e_cli alias view

E2E CLI set default user_names/Alias on your system
- you can set default alias/user_name on the system using following command :
e2e_cli alias set

E2E CLI Deleting User_name/Alias/User Token
- You can delete a user/user token from system using following command :
e2e_cli alias delete

Operating on Nodes/VM using CLI
Creating Node/VMs using CLI
- You can Create/Launch Node or VM using following command :
e2e_cli –alias node create inputs…
Now, enter your node type and os needed as follows
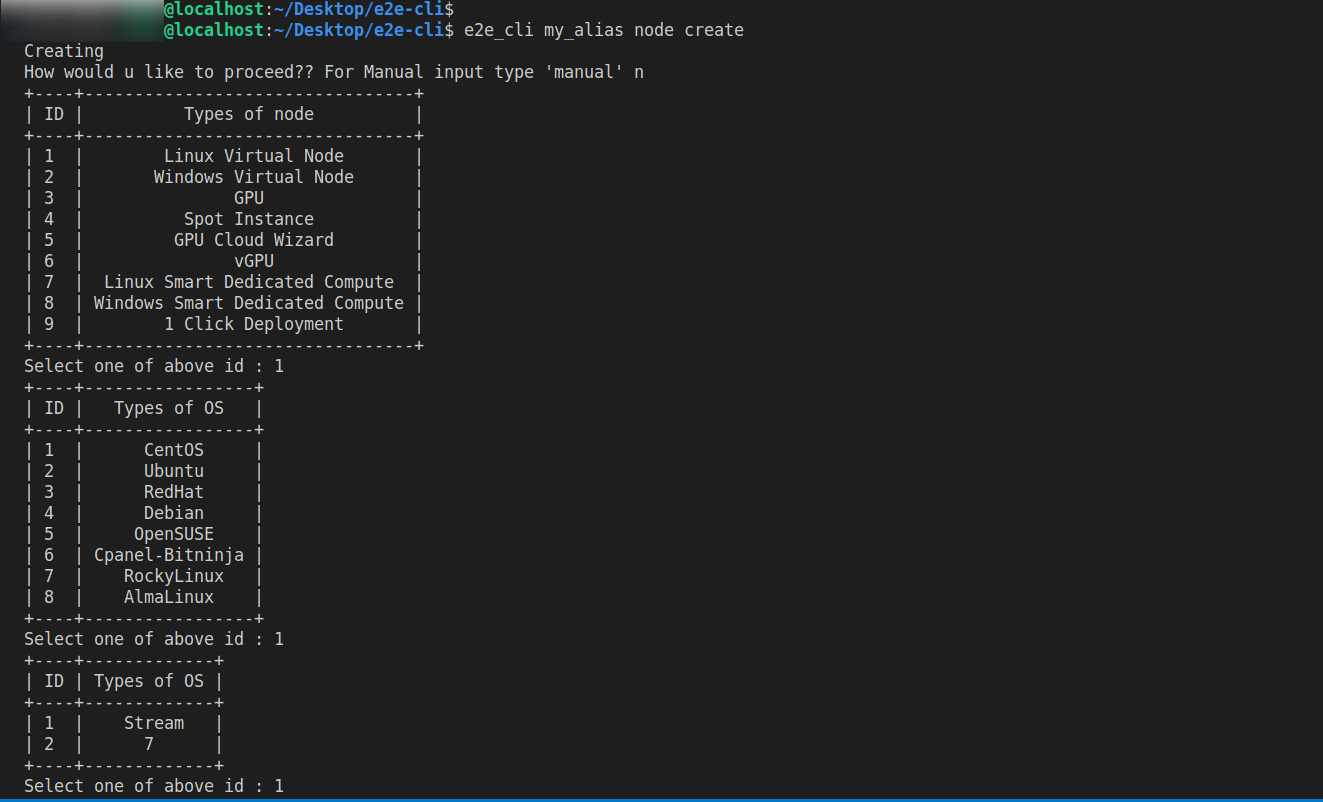
Here if desired you can give all manual inputs for OS and plan name
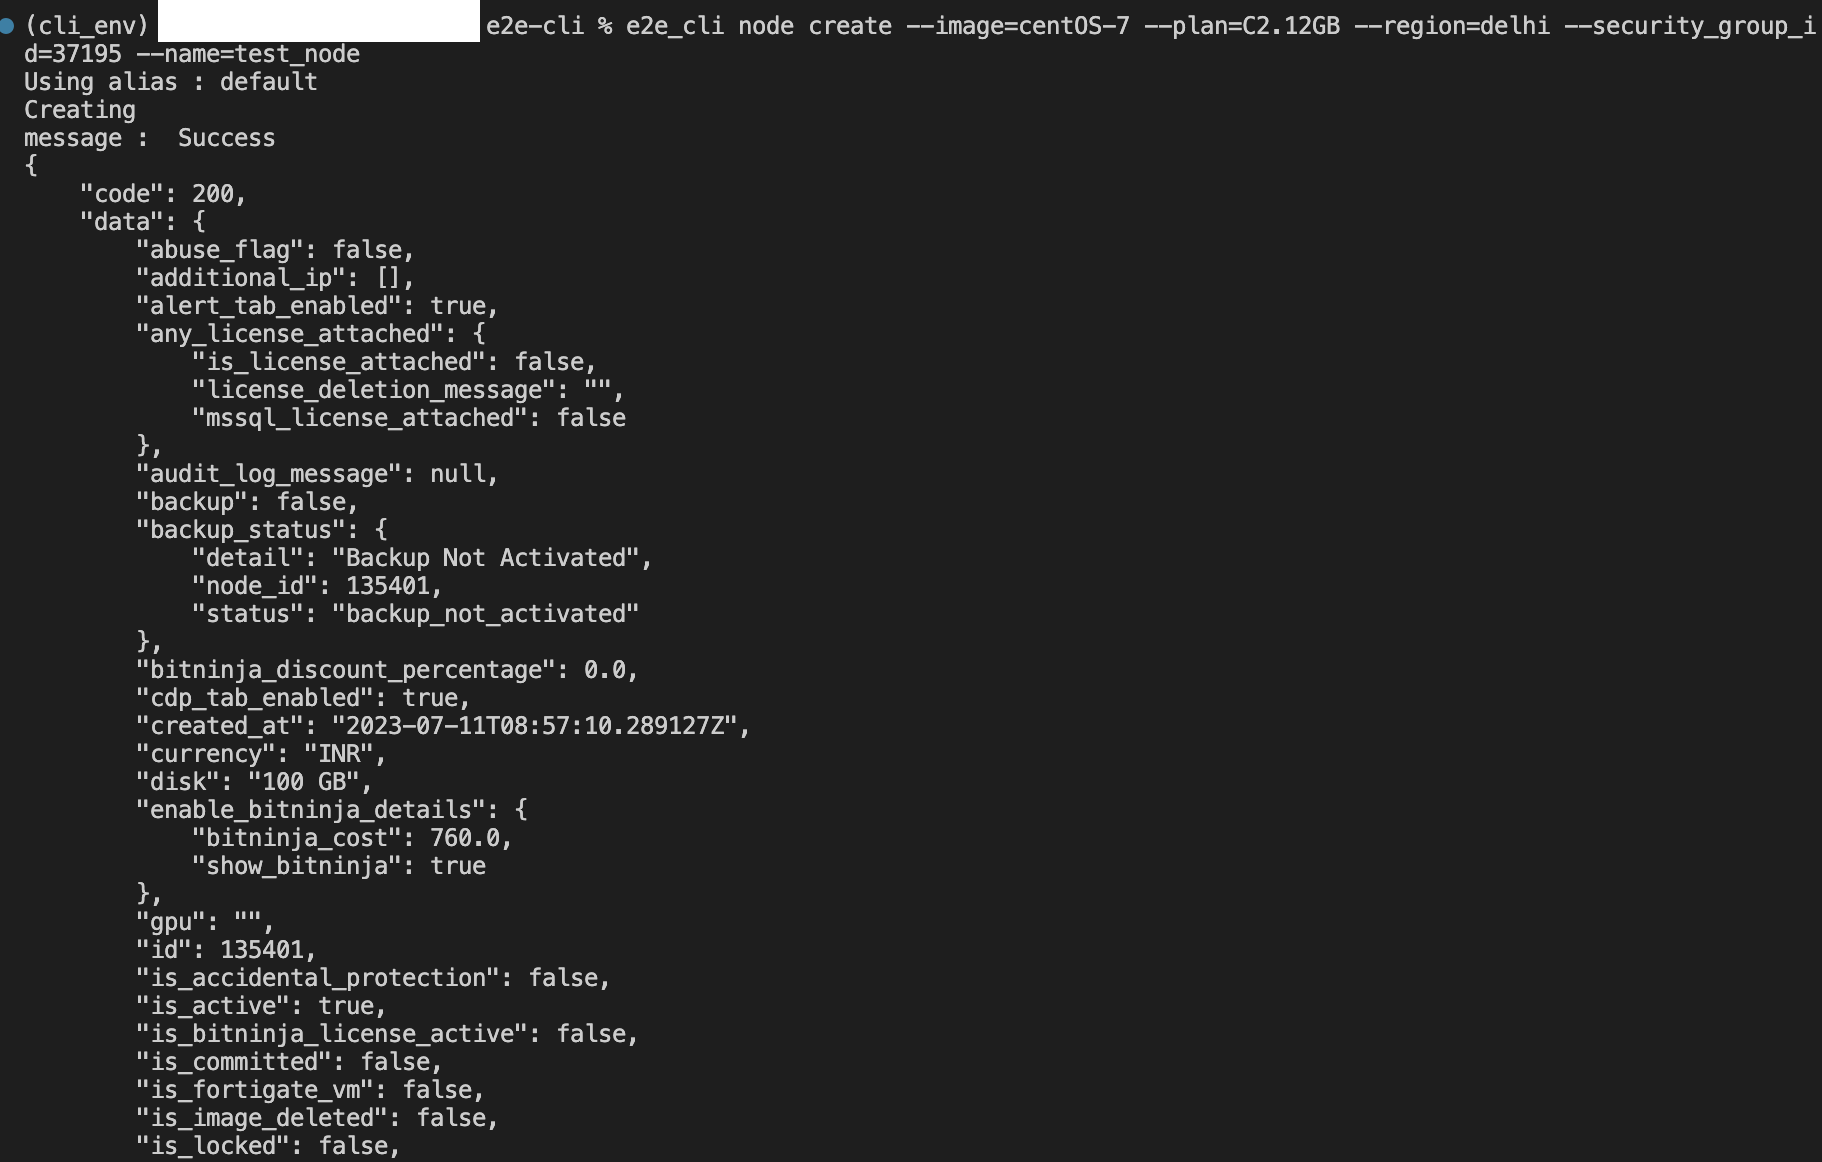
Alternatively, you can enter Plan, and enter node name to launch your node as follows
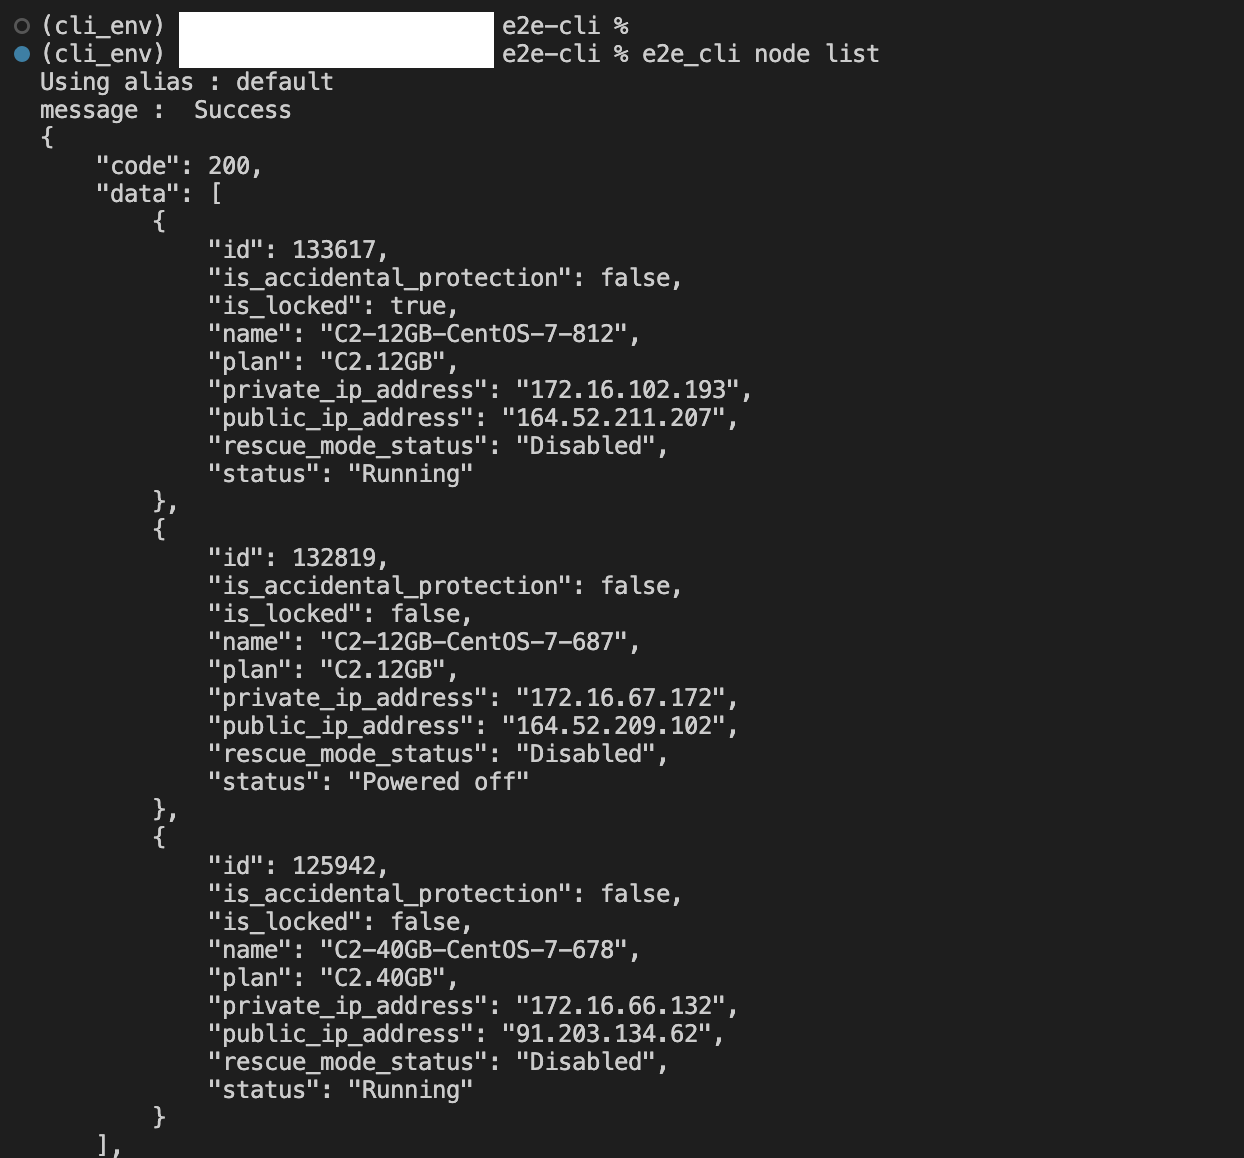
Listing all Node/VMs using CLI
- You can get a list of all your Node or VM using following command :
e2e_cli –alias node list
Getting a specific Node/VMs using CLI
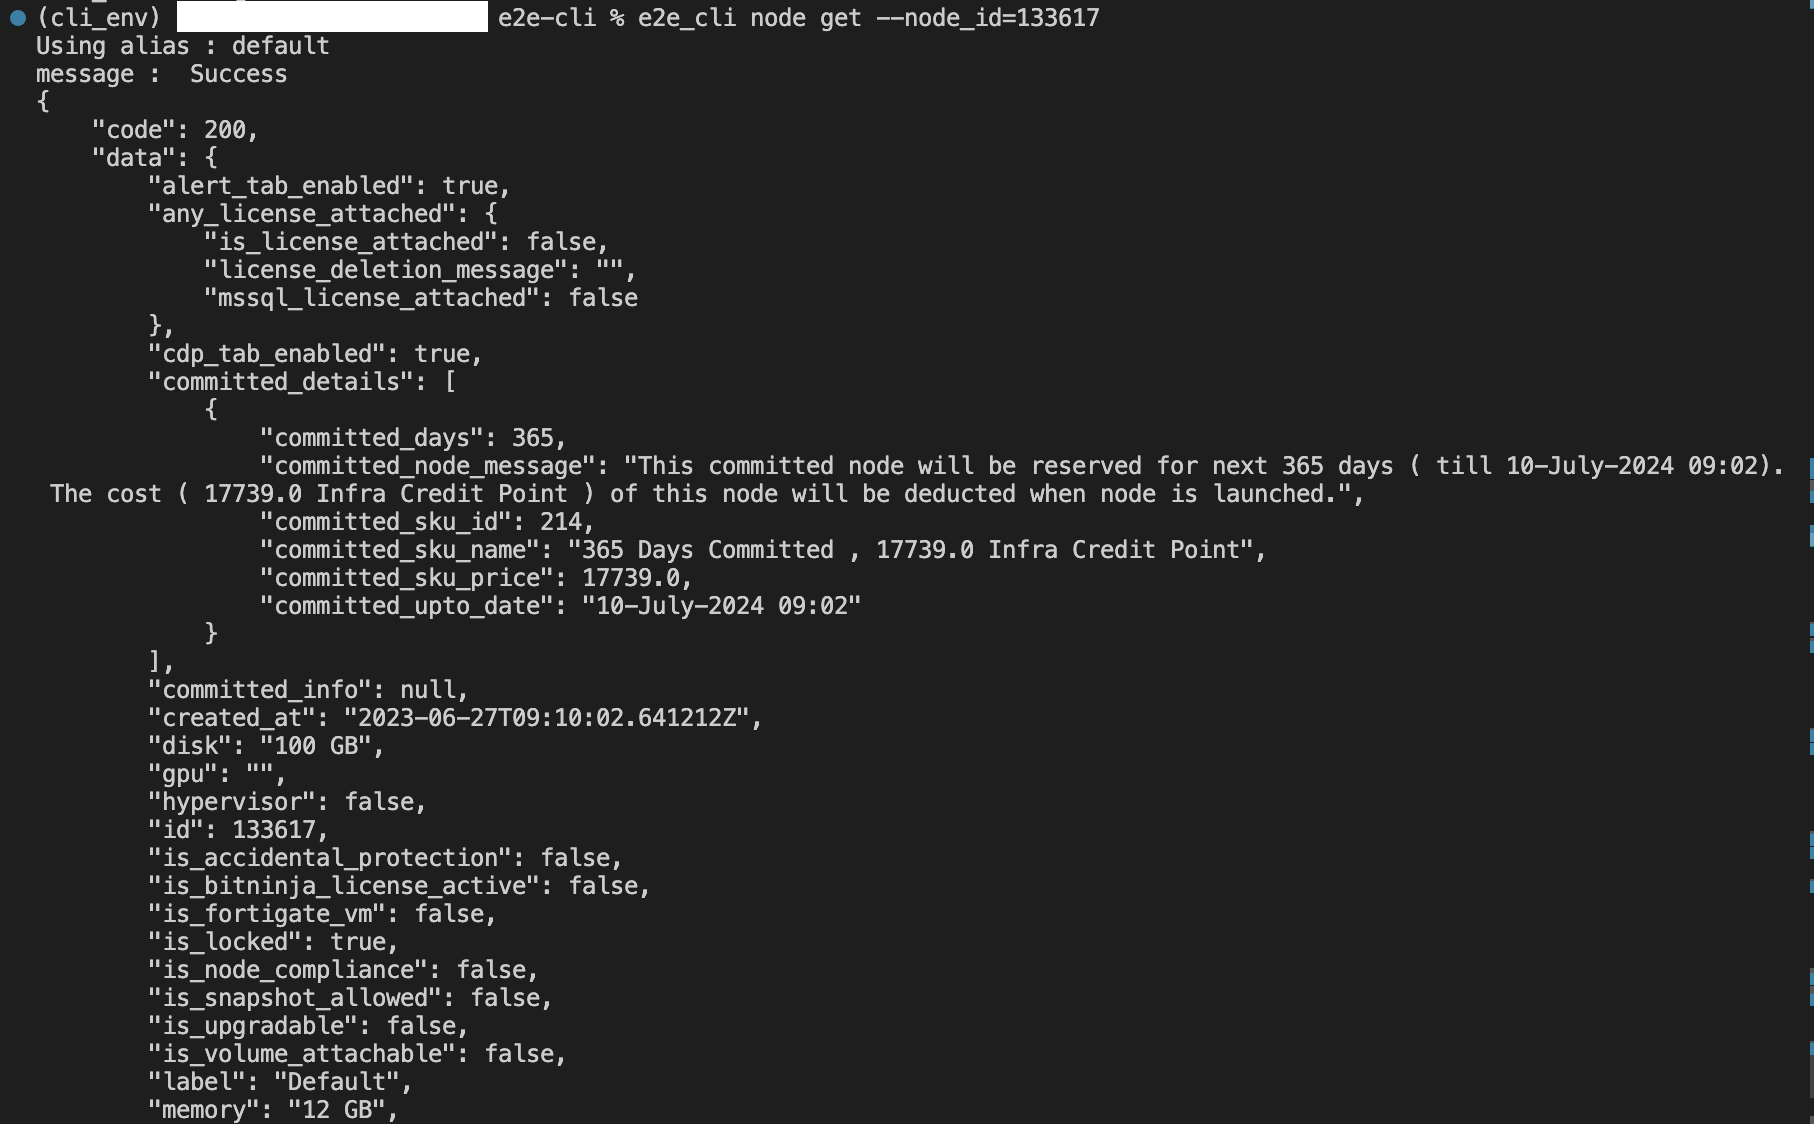
- You can get details of a specific Node or VM using following command :
e2e_cli –alias node get inputs…
Next you will have to enter the node ID as follows
Deleting Node/VMs using CLI
- You can Delete a Node or VM using following command :
e2e_cli –alias node delete inputs…
Next you will have to enter the ID of node, that you want to delete and give confirmation as follows

Operating on DBaaS using CLI
Creating DBaaS using CLI
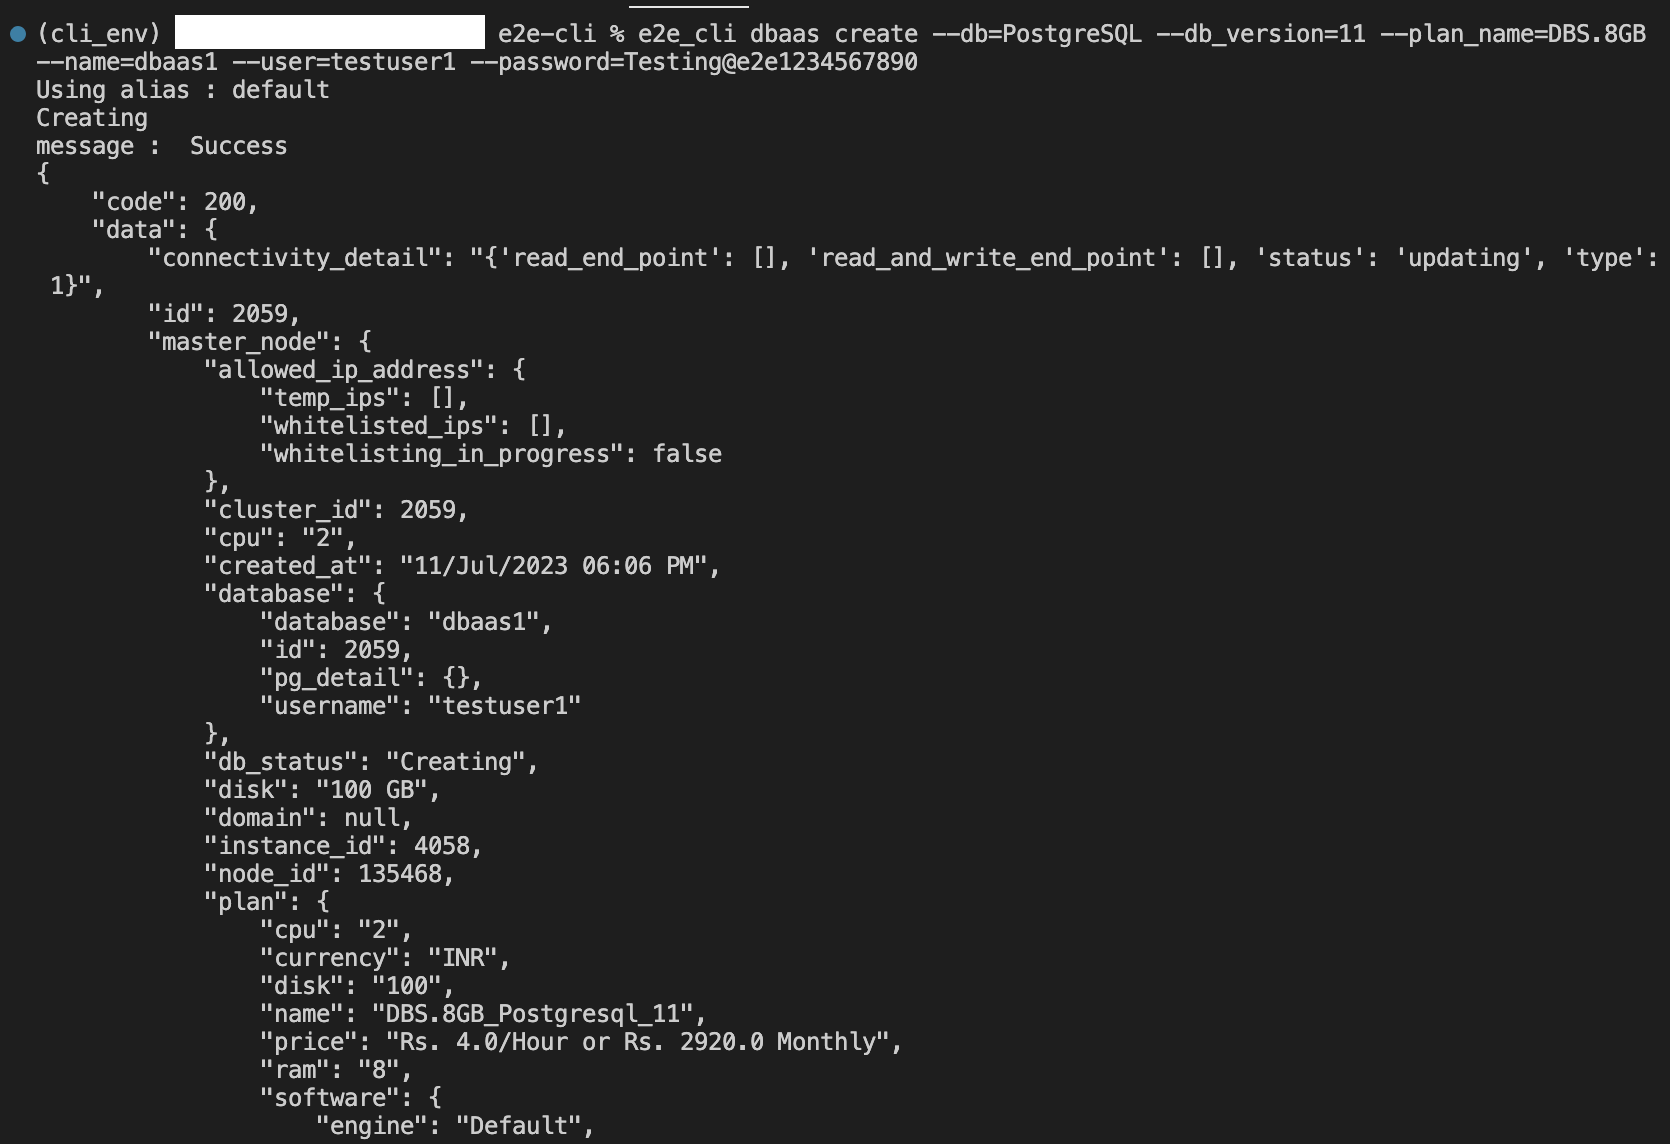
- You can Create/Launch DBaaSusing following command :
e2e_cli –alias dbaas create inputs…
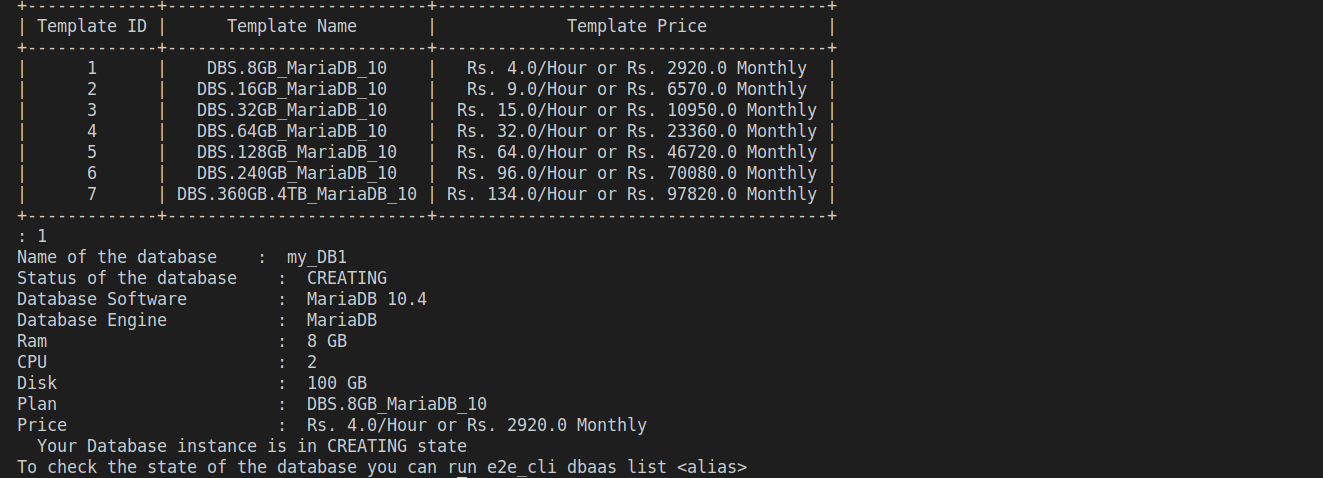
Now, enter your DB type and enter DB name needed as follows
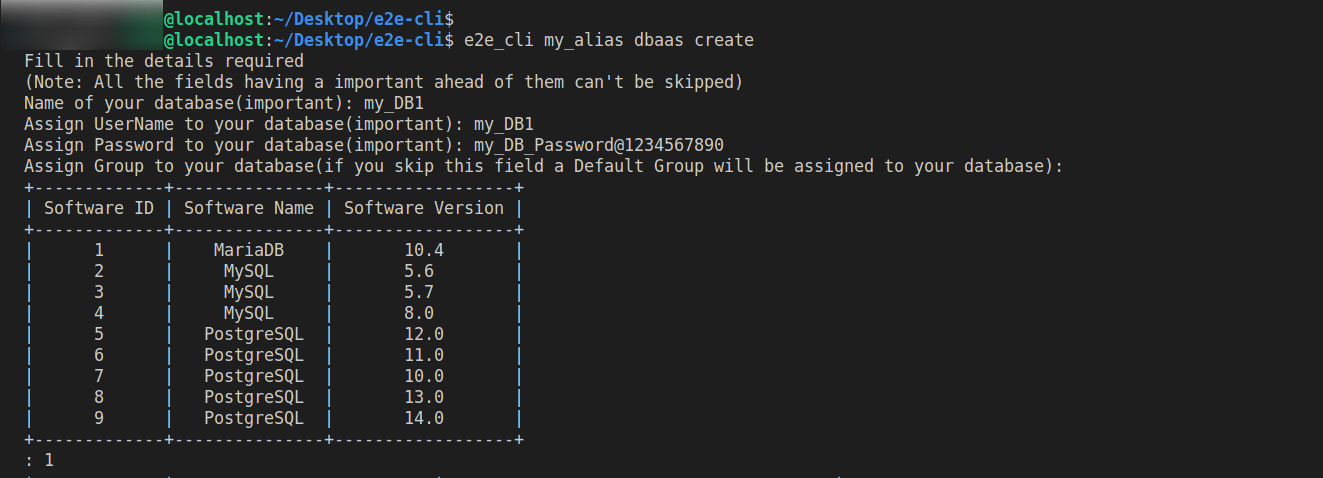
- Alternatively, select your Plan to launch your DBaaS as follows
e2e_cli –alias dbaas create –auto…
Listing all DBaaS using CLI
- You can get a list of all your DBaaS using following command :
e2e_cli –alias Dbaas list

Deleting DBaaS using CLI
- You can Delete a DBaaS using following command :
e2e_cli –alias dbaas delete
Next you will have to enter the ID of DBaaS, that you want to delete and give confirmation as follows

Operating on Bucket using CLI
Creating Bucket using CLI
- You can Create/Launch Bucket using following command :
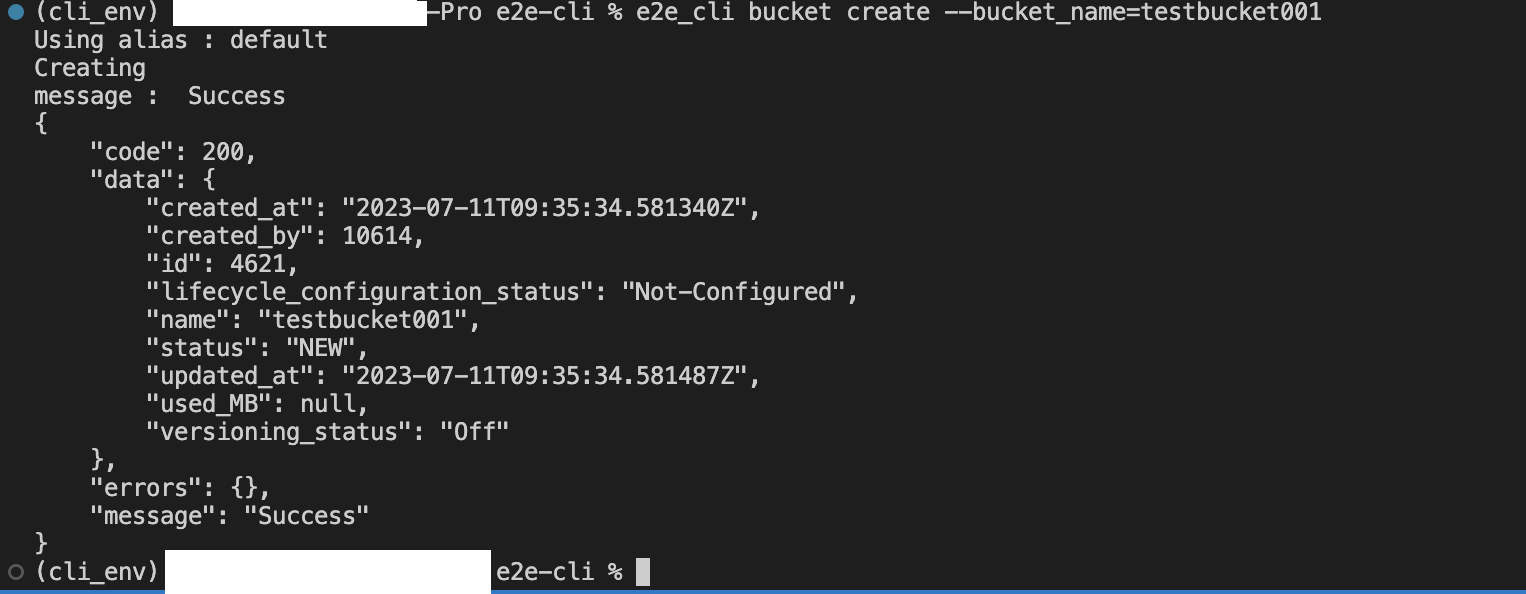
e2e_cli –alias bucket create inputs…
Now, enter your bucket name as follows
Listing all Bucket using CLI
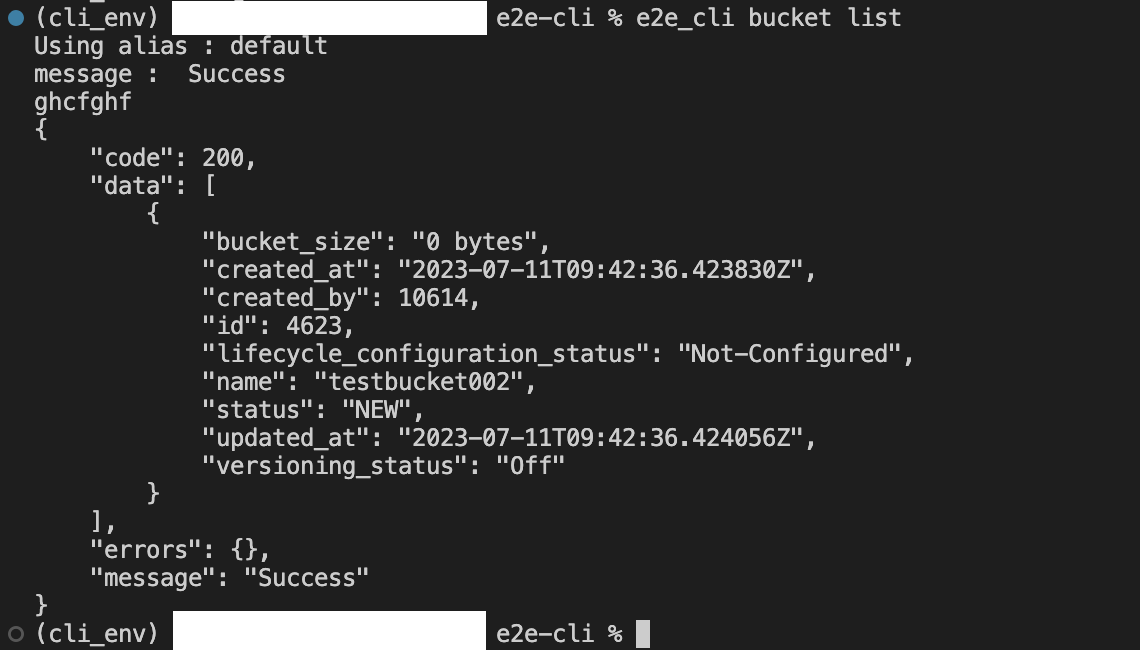
- You can get a list of all your Bucket using following command :
e2e_cli –alias bucket list
Deleting Bucket using CLI
- You can Delete a Bucket using following command :
e2e_cli –alias bucket delete inputs…
Next you will have to enter the ID/name of bucket,, that you want to delete and give confirmation as follows

Performing action on Bucket using CLI
- You can performing action a Bucket using following command :
e2e_cli –alias bucket –action={action_desired} inputs…
Next you will have to enter the ID/name of bucket as follows, same for any other resource

Operating on LoadBalancer using CLI
Creating LoadBalancer using CLI
- You can Create/Launch LoadBalancer using following command :
e2e_cli –alias lb create inputs…
Now, enter your lb type and requirement needed as follows
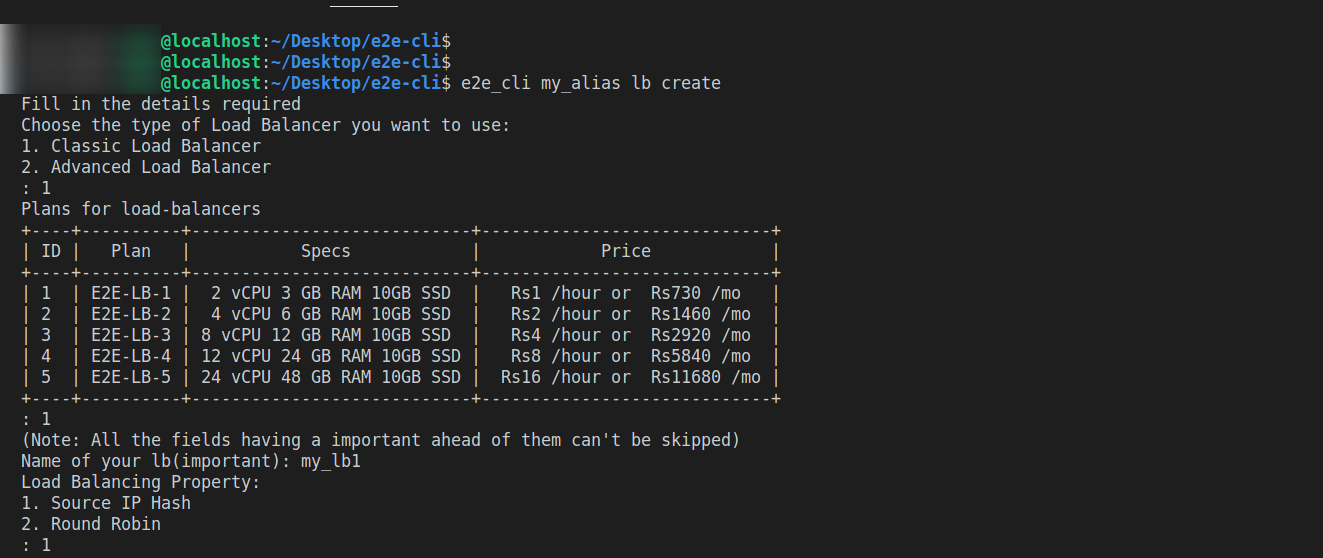
Finally select your rules, and enter lb name to launch your LoadBalancer as follows

Listing all LoadBalancer using CLI
- You can get a list of all your LoadBalancer using following command :
**e2e_cli –alias lb list **

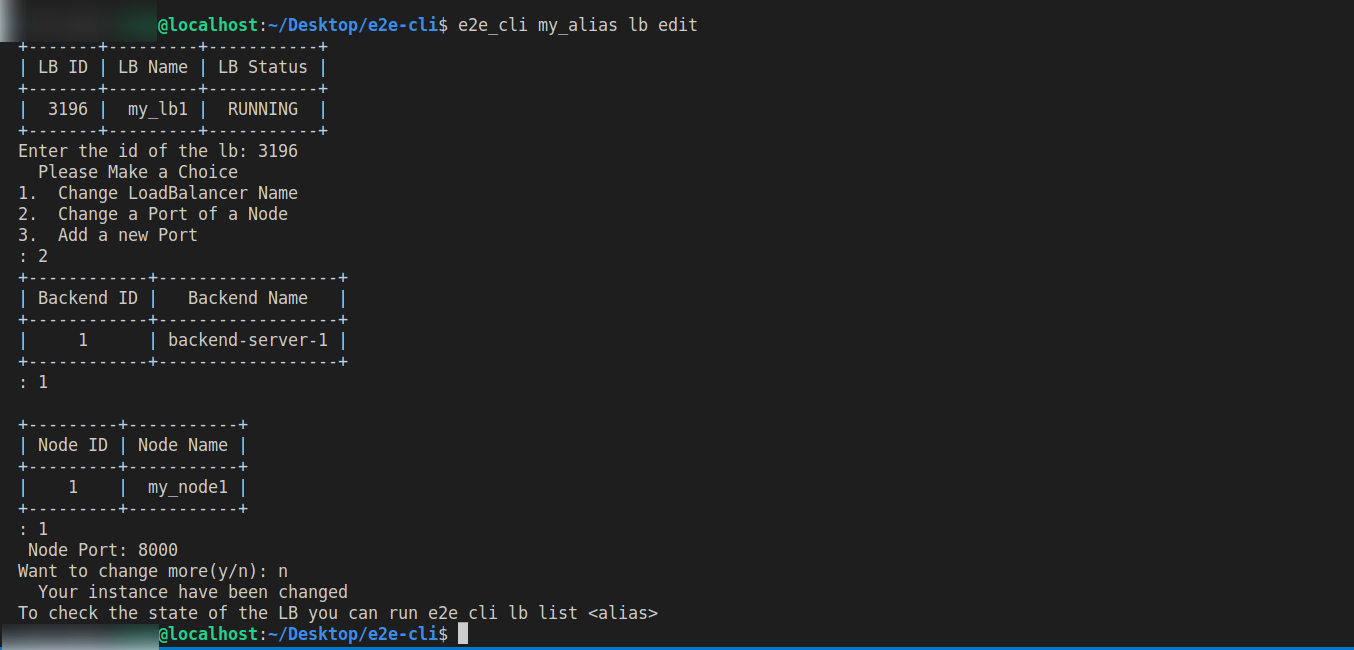
Editing a specific LoadBalancer using CLI
- You can get details of a specific LoadBalancer using following command :
e2e_cli –alias lb edit
Next you will have to enter the lb ID as follows
Deleting LoadBalancer using CLI
- You can Delete a LoadBalancer following command :
e2e_cli –alias lb delete
Next you will have to enter the ID of LoadBalancer, that you want to delete and give confirmation as follows

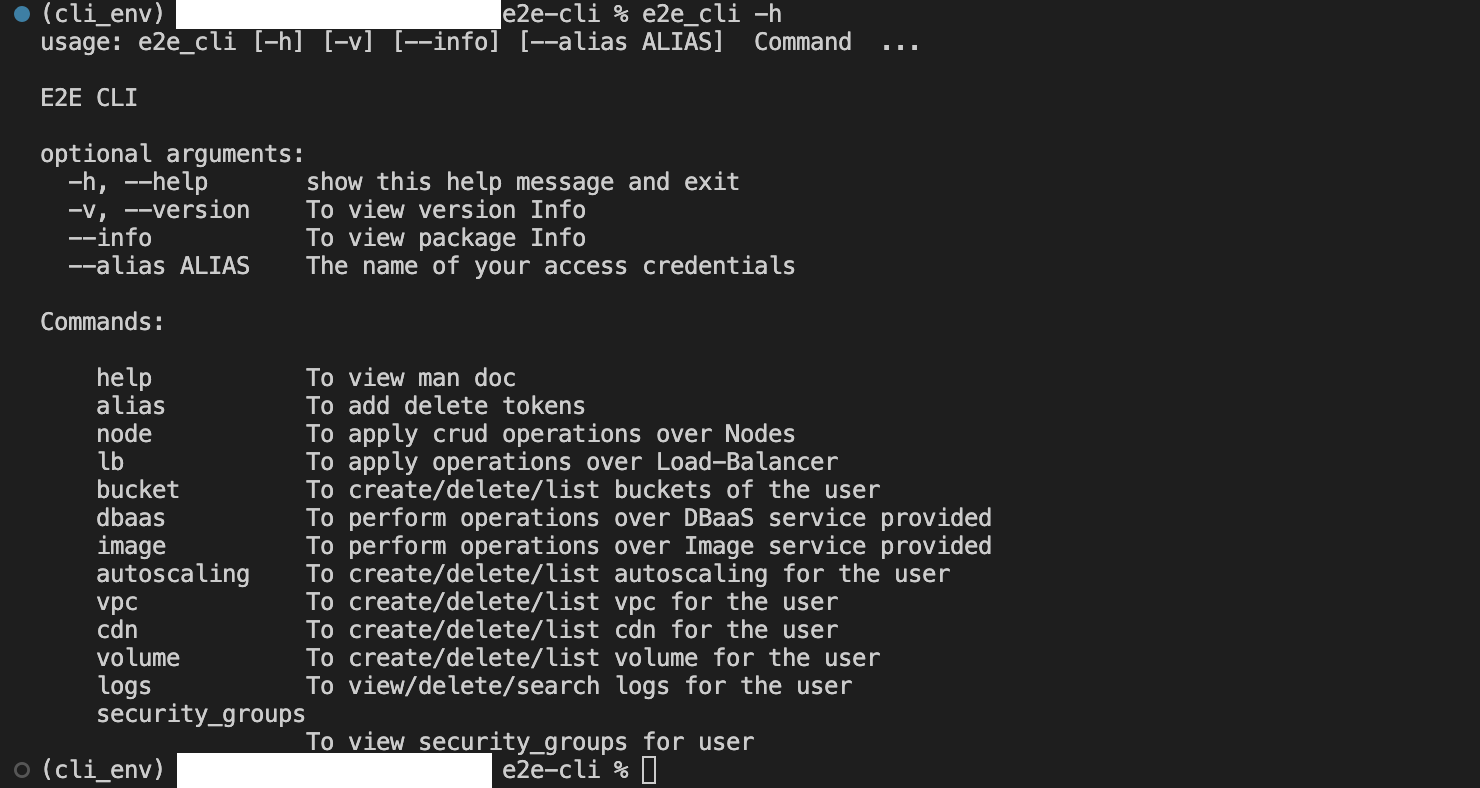
E2E CLI Help
- you can always get help by using following command :
- e2e_cli -h
or
e2e_cli [alias] [command] [sub-command] –help
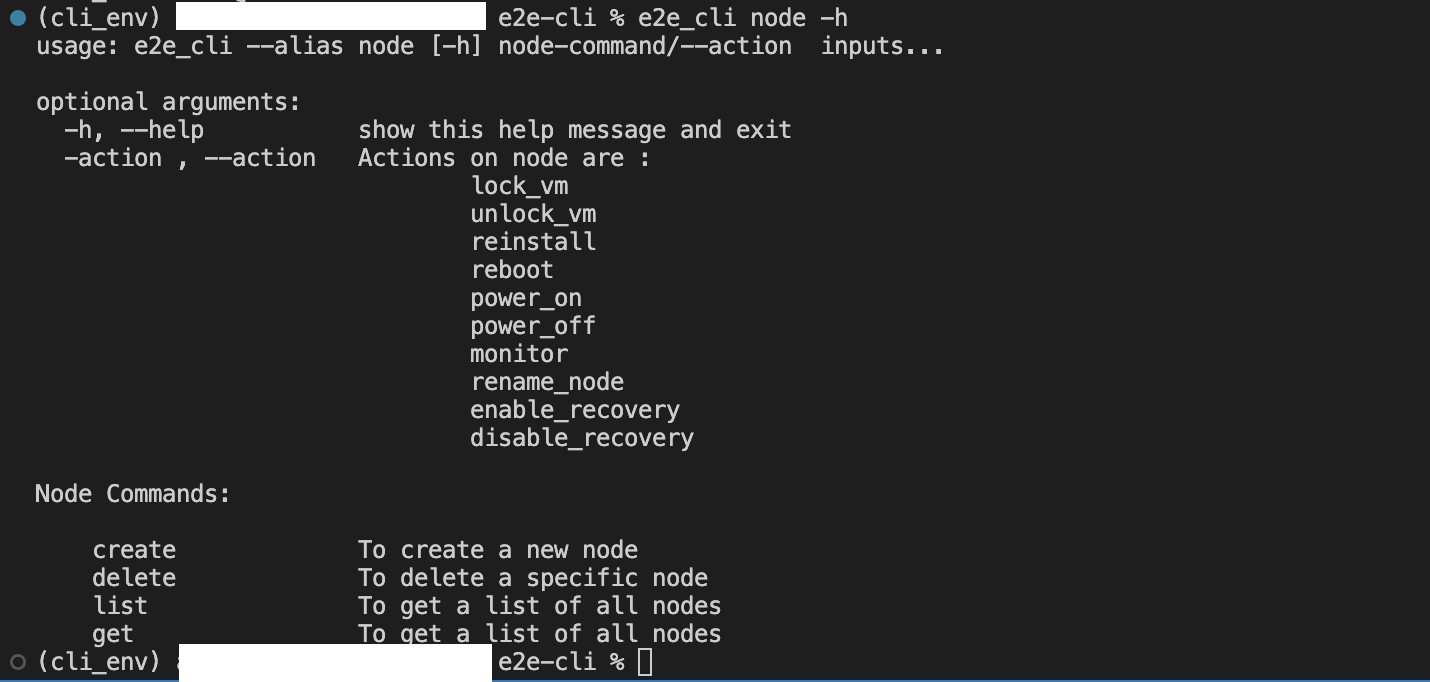
- you can know about inputs required for a command by using following :
e2e_cli [alias] [command] [sub-command] –info

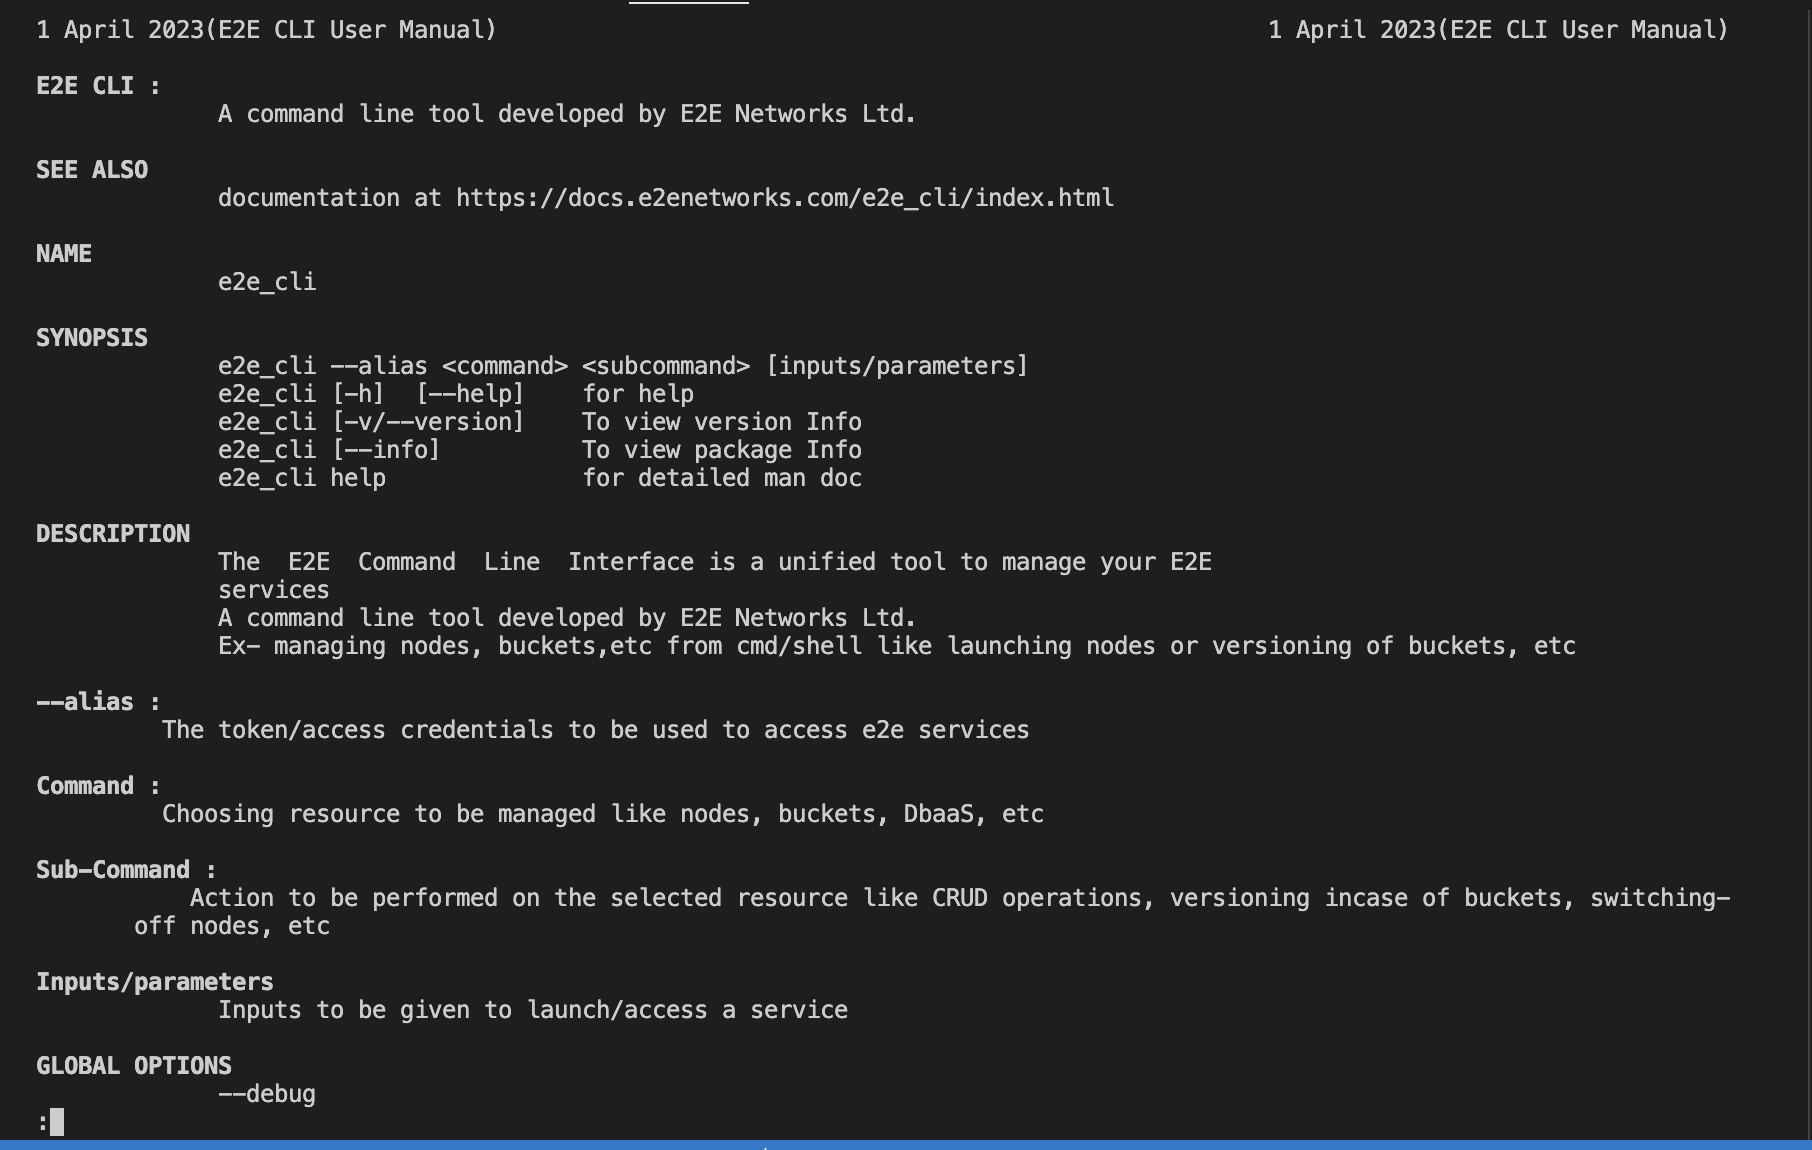
- you can view man doc by :
e2e_cli help
Automating your workflow
you can automate your workflow/load in the following manners using CLI tool and python scripts as per your specifications
