Step by Step Guide to Fine Tune Models
Introduction
Fine-tuning a model refers to the process of taking a pre-trained machine learning model and further training it on a specific task or dataset to adapt it to the nuances of that particular domain. The term is commonly used in the context of transfer learning, where a model trained on a large and diverse dataset (pre-training) is adjusted to perform a specific task or work with a specific dataset (fine-tuning).
What is Fine-Tuning ?
Fine-tuning is a technique in machine learning where a pre-trained model is adapted to a new task by training it on a small amount of data that is specific to the new task. This is different to training a model from scratch, which requires a large amount of data and can be time-consuming.
In the context of neural networks and deep learning, fine-tuning typically involves adjusting the parameters of a pre-trained model using a smaller, task-specific dataset.
How to Create a Fine-Tuning Job ?
To initiate the Fine-Tuning Job process, first, the user should navigate to the sidebar section and select “Foundation Studio.” Upon selecting Foundation Studio, a dropdown menu will appear, featuring an option labeled “Fine-Tune Models.
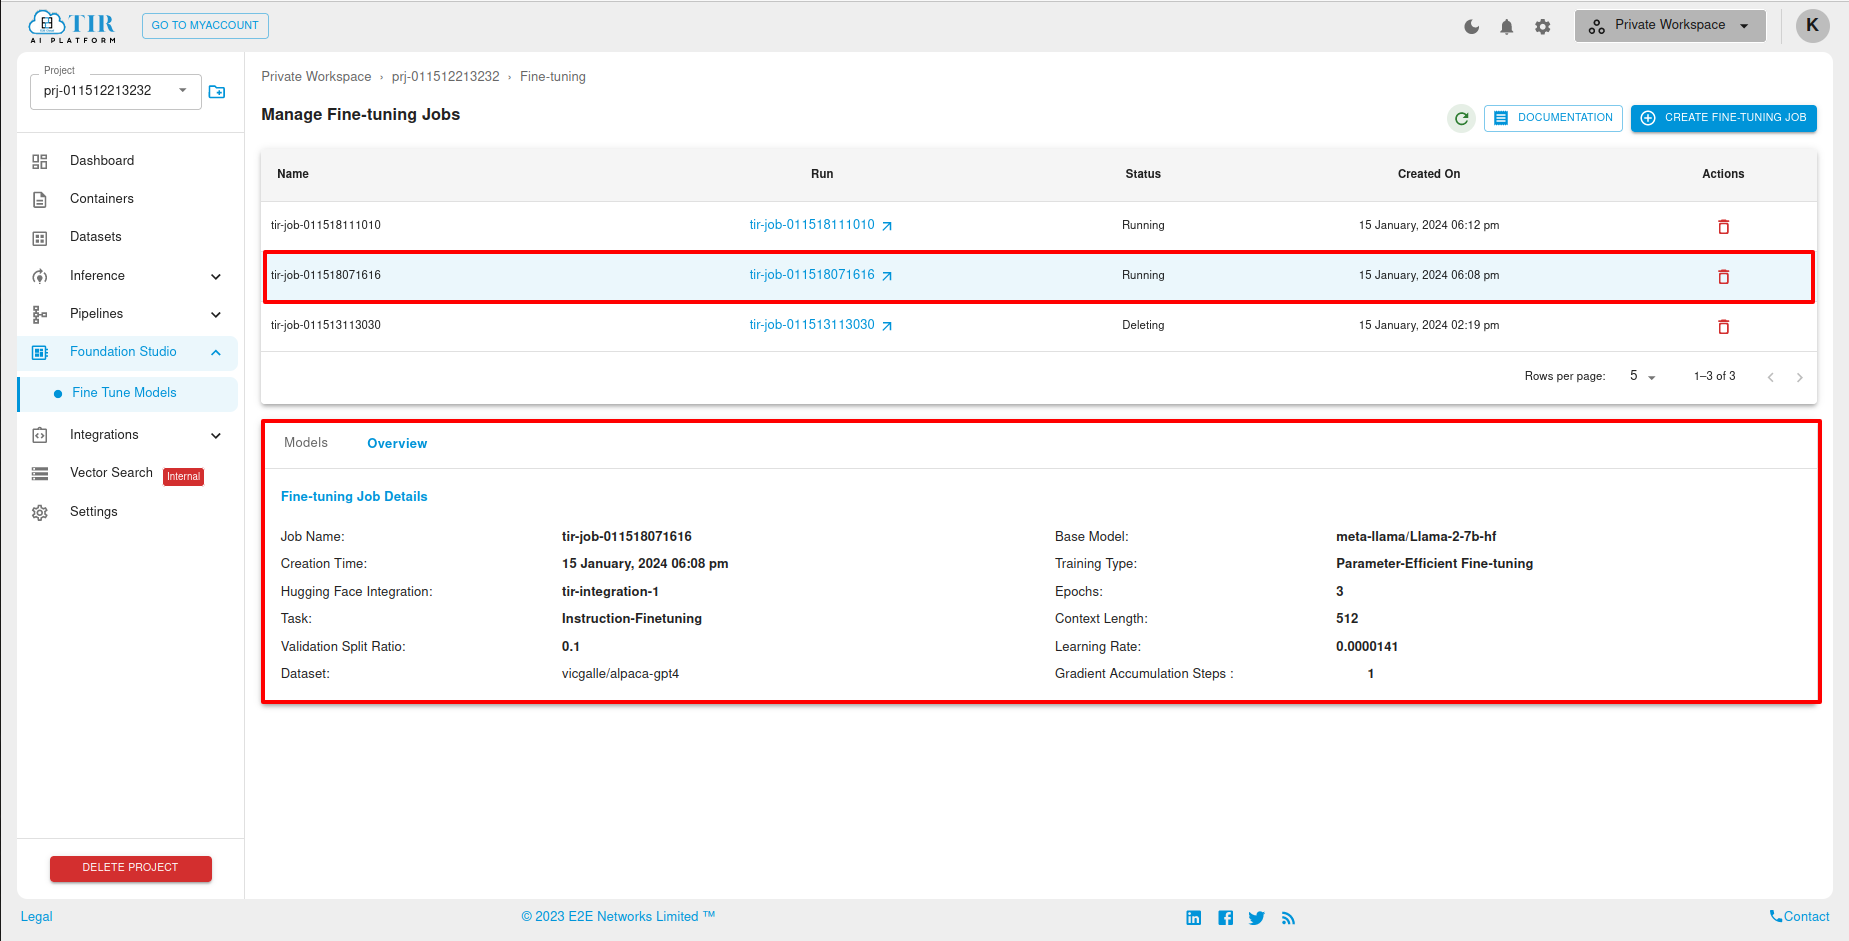
Upon clicking the “Fine-Tune Models” option, the user will be directed to the “Manage Fine-Tuning Jobs” page.

After redirect to the “Manage Fine-Tuning-Jobs”, On this page, users can locate and click on the “Create Fine-Tuning Job” button or “Click-here” button for create Fine-Tune-models.

After clicking the ‘Create Fine-Tuning Job’ button, the ‘Create Fine-Tuning Job’ page will open. On this page, there are several option such as “Job-Name”, “Model” and “Hugging Face Token”.
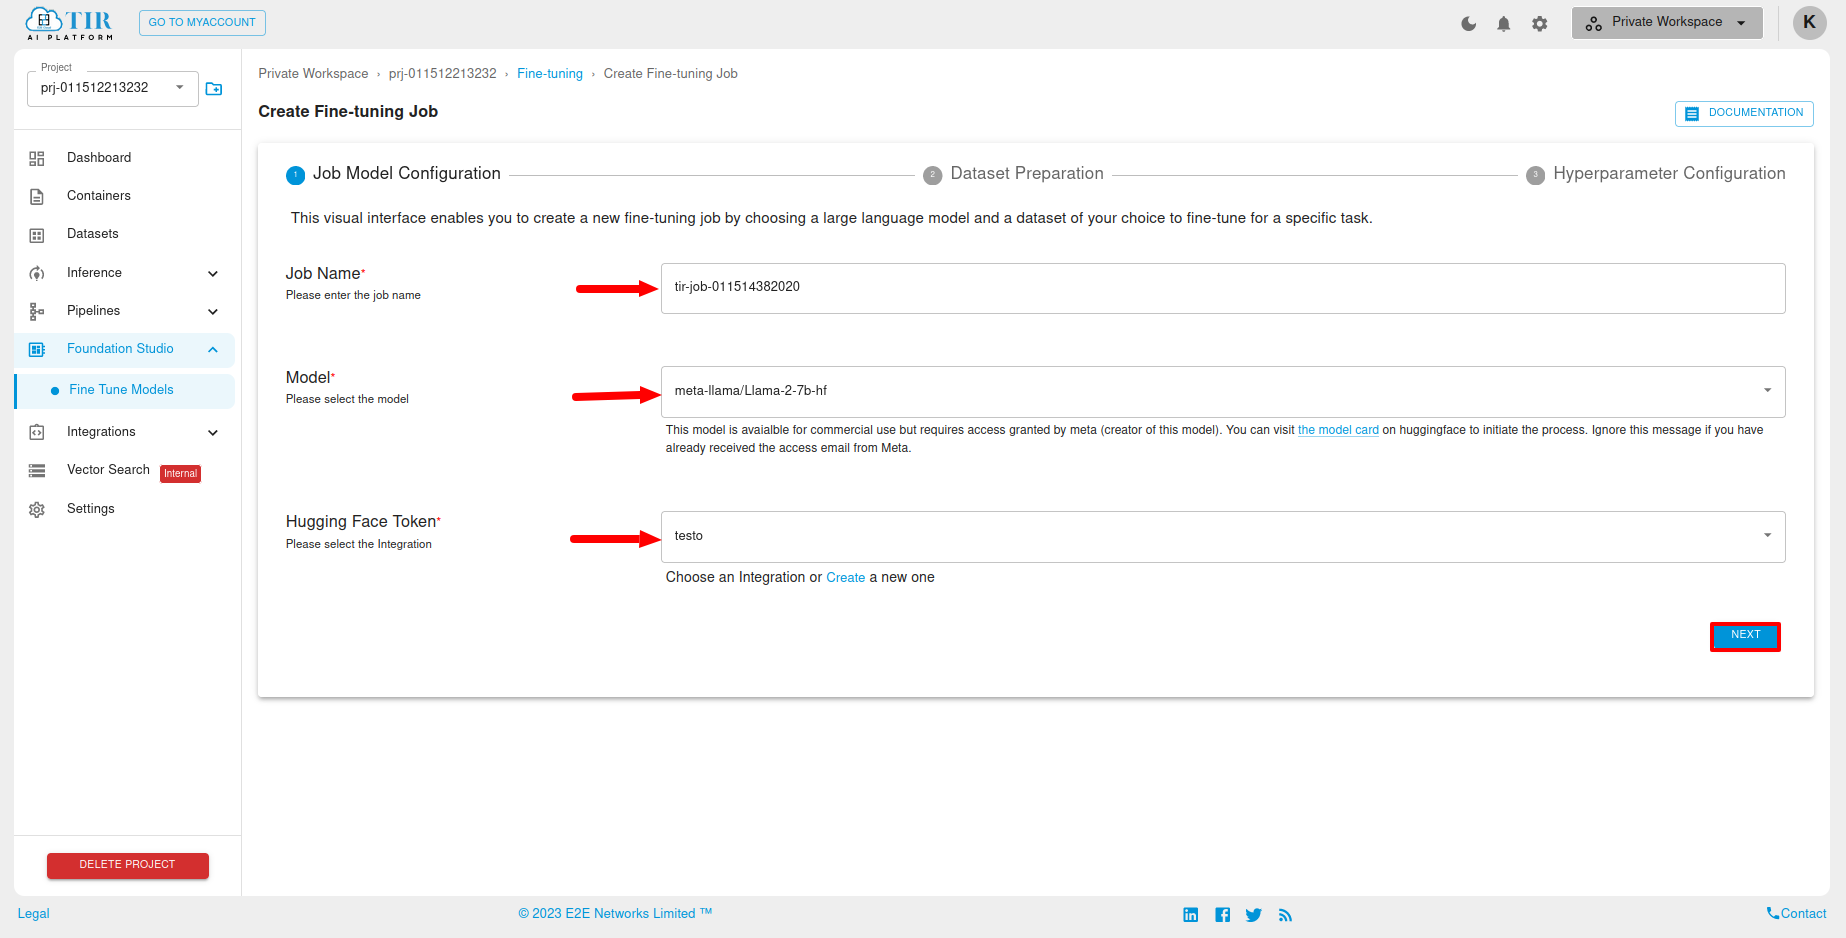
If the user already has an integration with Hugging Face token, they can select it from the dropdown options. If the user does not have any integration setup with Hugging Face, they can click on the ‘Create New’ link, and the ‘Create Integration’ page will open. After adding a token, user can move to next stage by clicking on next button.
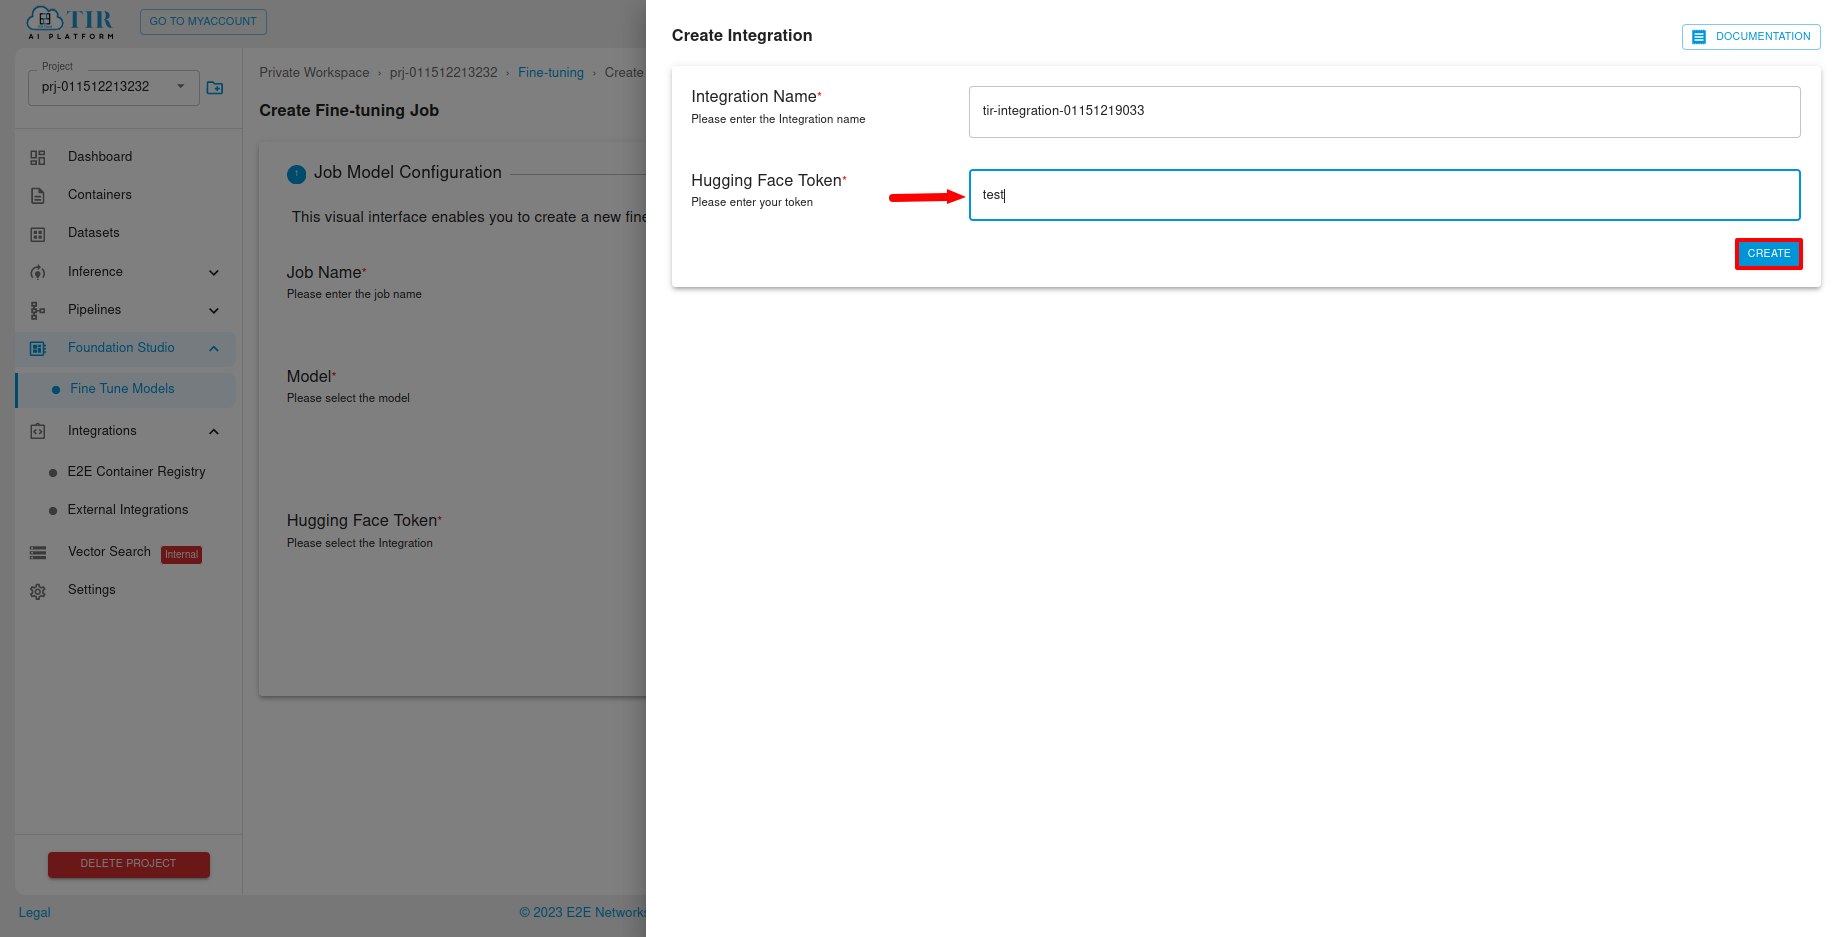
Note
Some model are available for commercial use but requires access granted by their Custodian/Administrator (creator/maintainer of this model). You can visit the model card on huggingface to initiate the process.
How to define Dataset-Preparation ?
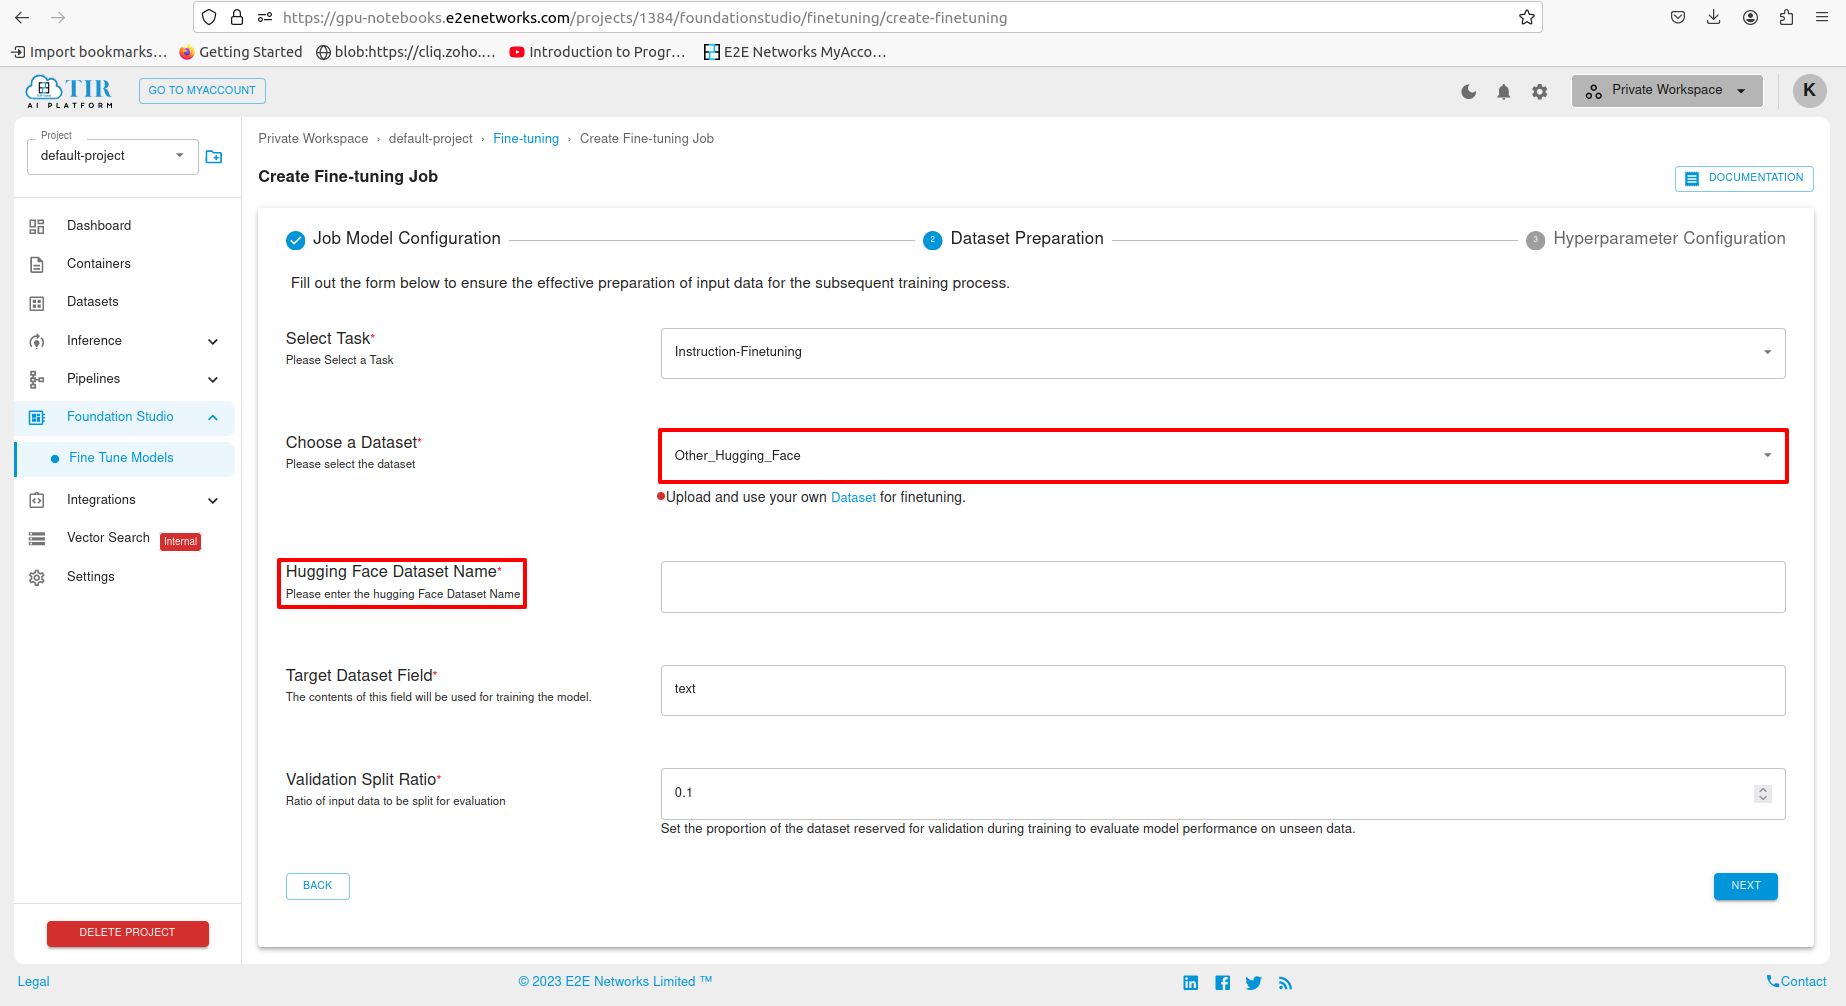
After defining the Job Model configuration, the users can move on to next section for Dataset Preparation. The Dataset page will open, providing several options such as “Select Task,” “Choosing a Dataset,” “Validation Split Ratio,” and “Prompt Configuration”. Once these options are filled, the dataset preparation configuration will be set and the user can move to next section.
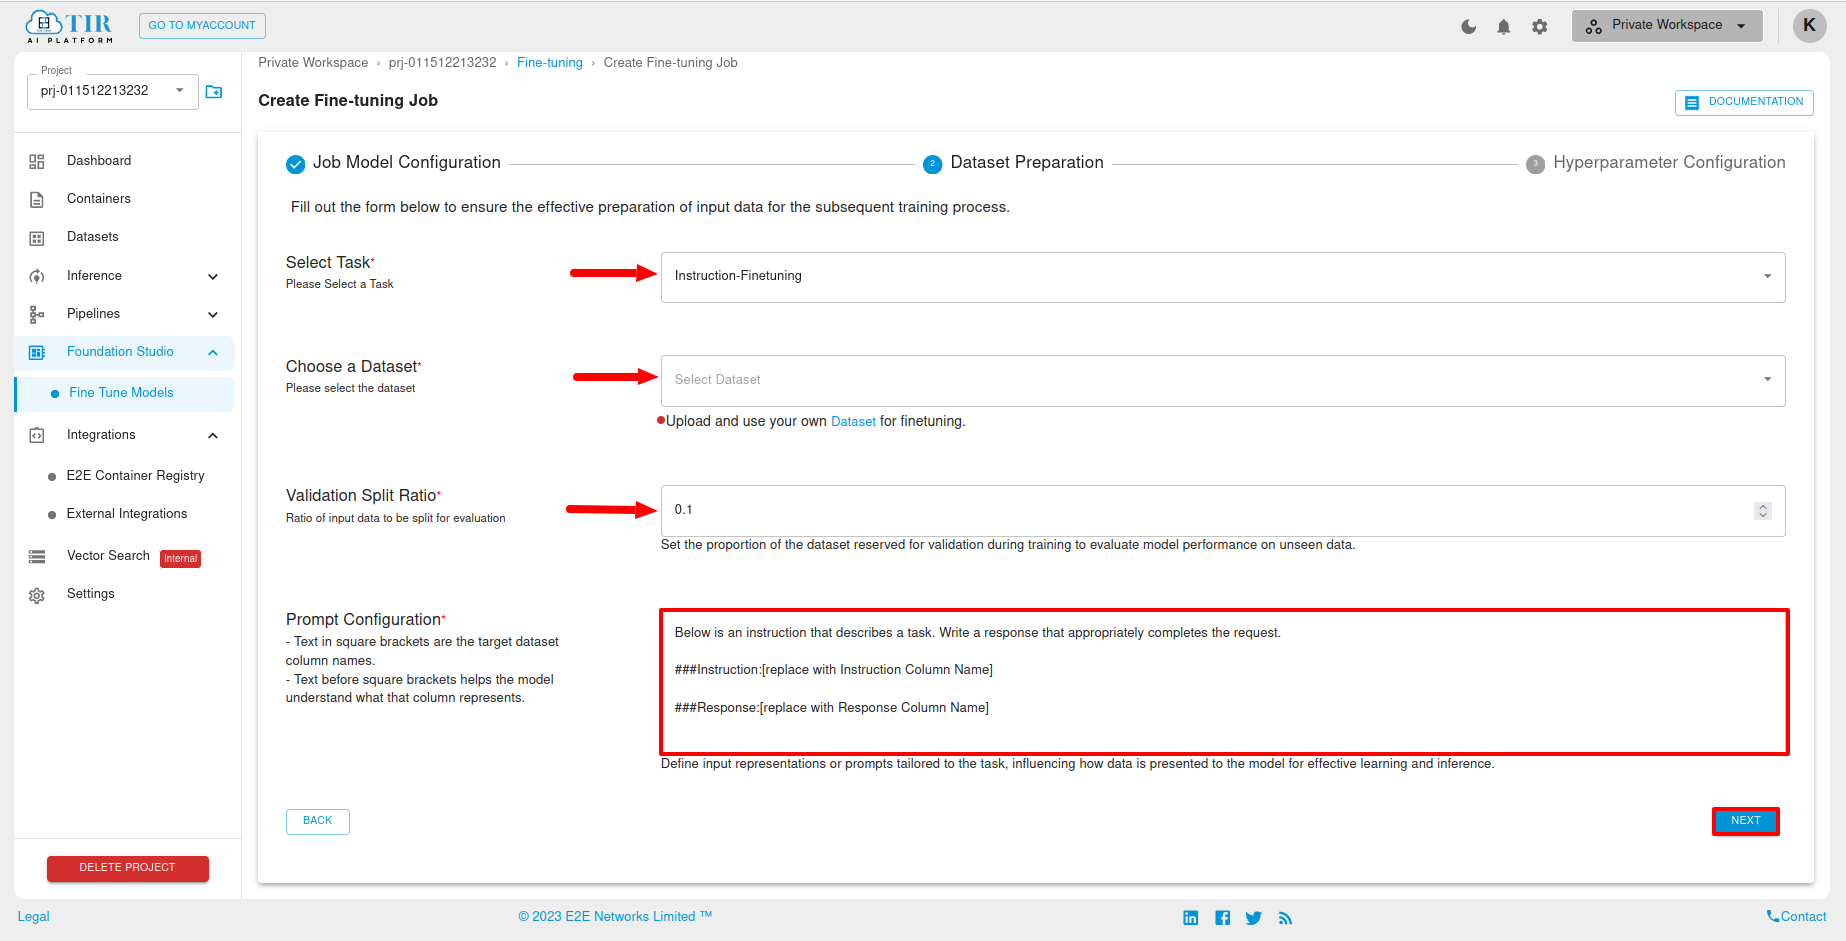
If desired, the users can upload and use their own dataset for fine-tuning.

If the user selects the ‘Other-Hugging-Face’ option in the dataset, they can give name of any publicly available dataset from hugging face. The ‘Hugging Face Dataset Name’ field will be included for the Dataset Preparation.
How to define a Hyperparameter Configuration ?
After giving the dataset preparation info, The Hyperparameter configuration page will open, the user can now give hyperparameter configuration as desired by fill out the form below to tailor the training process for effective hyperparameter tuning.
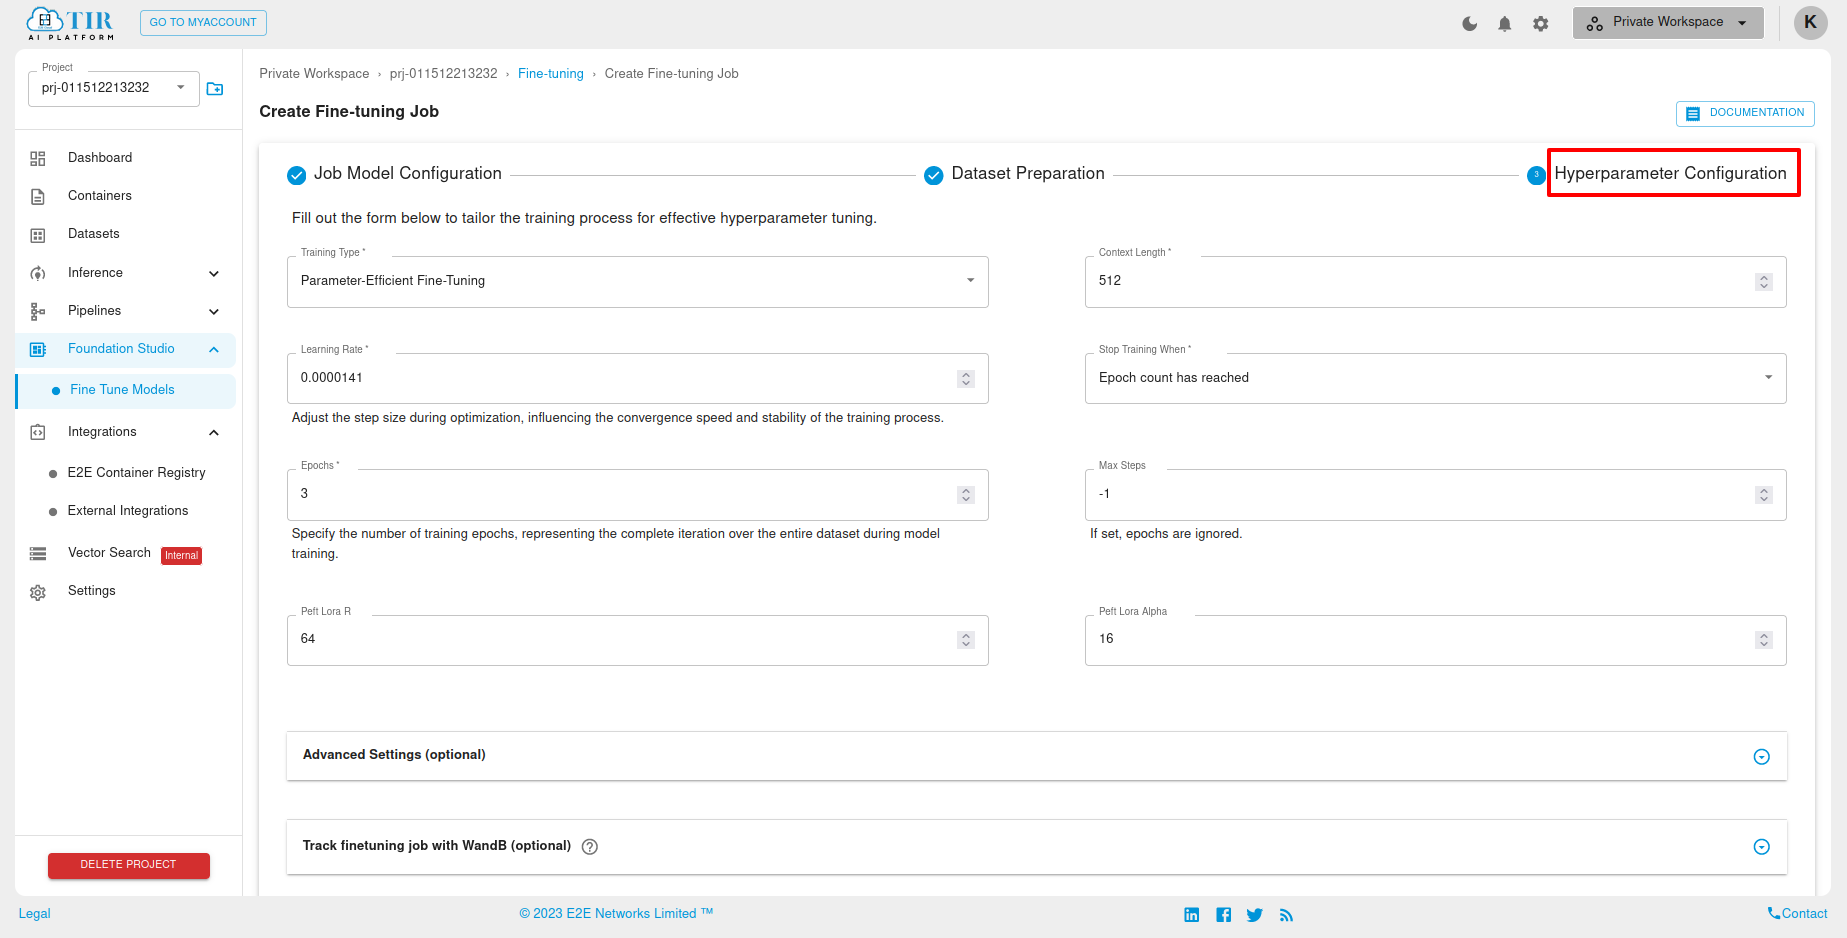
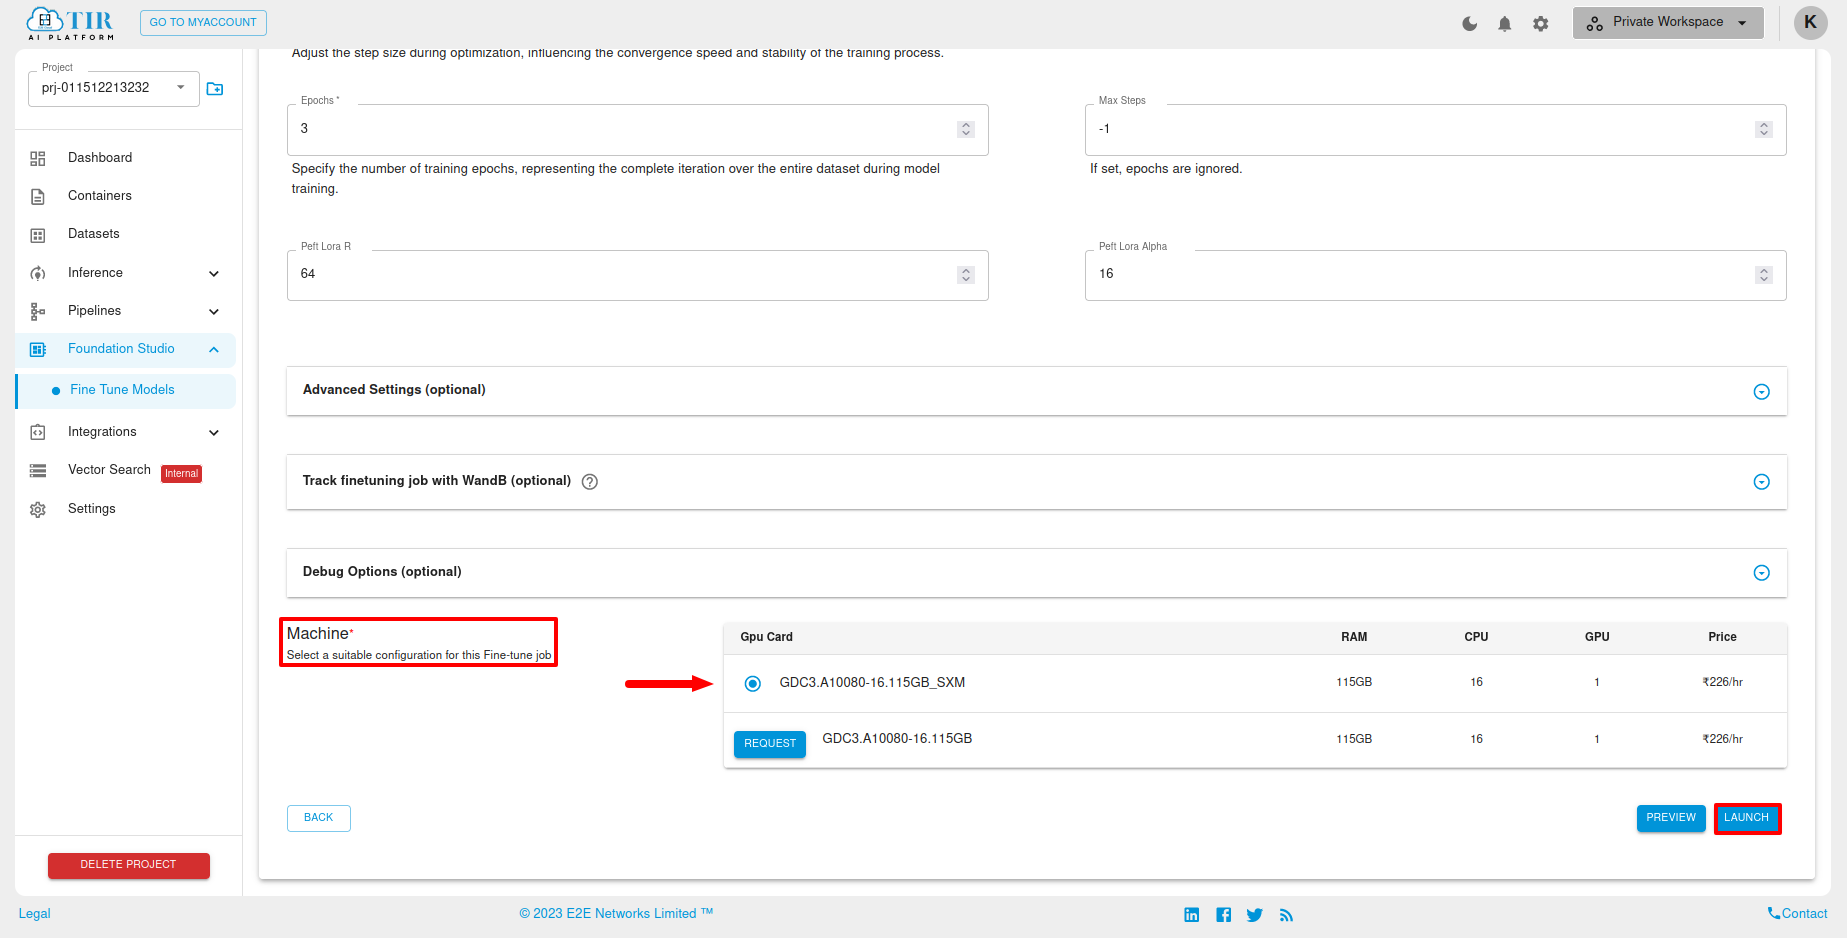
After filling out the options above, the user can select the ‘Advanced Setting’ option and fill in the below options, which are present in the advanced settings.
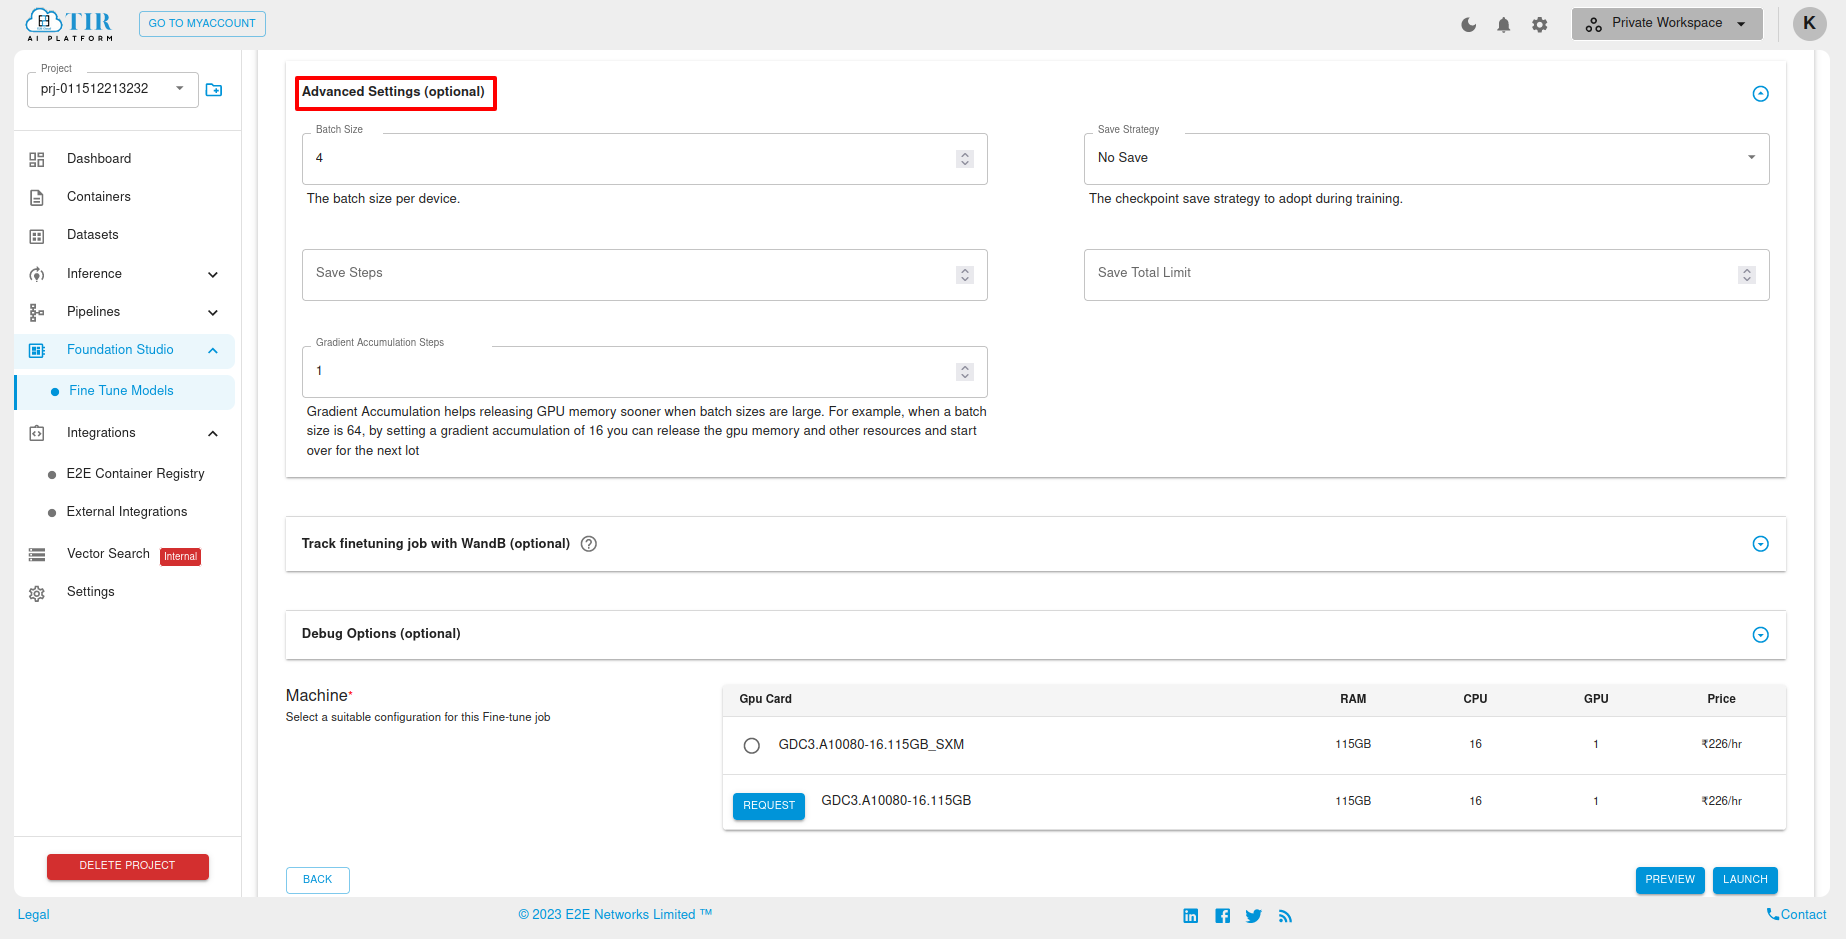
After filling out the advanced settings options, the user will then track the job with ‘WandB Integration’ and proceed to fill in the required details. Also they can describe the ‘debug’ option as desired.

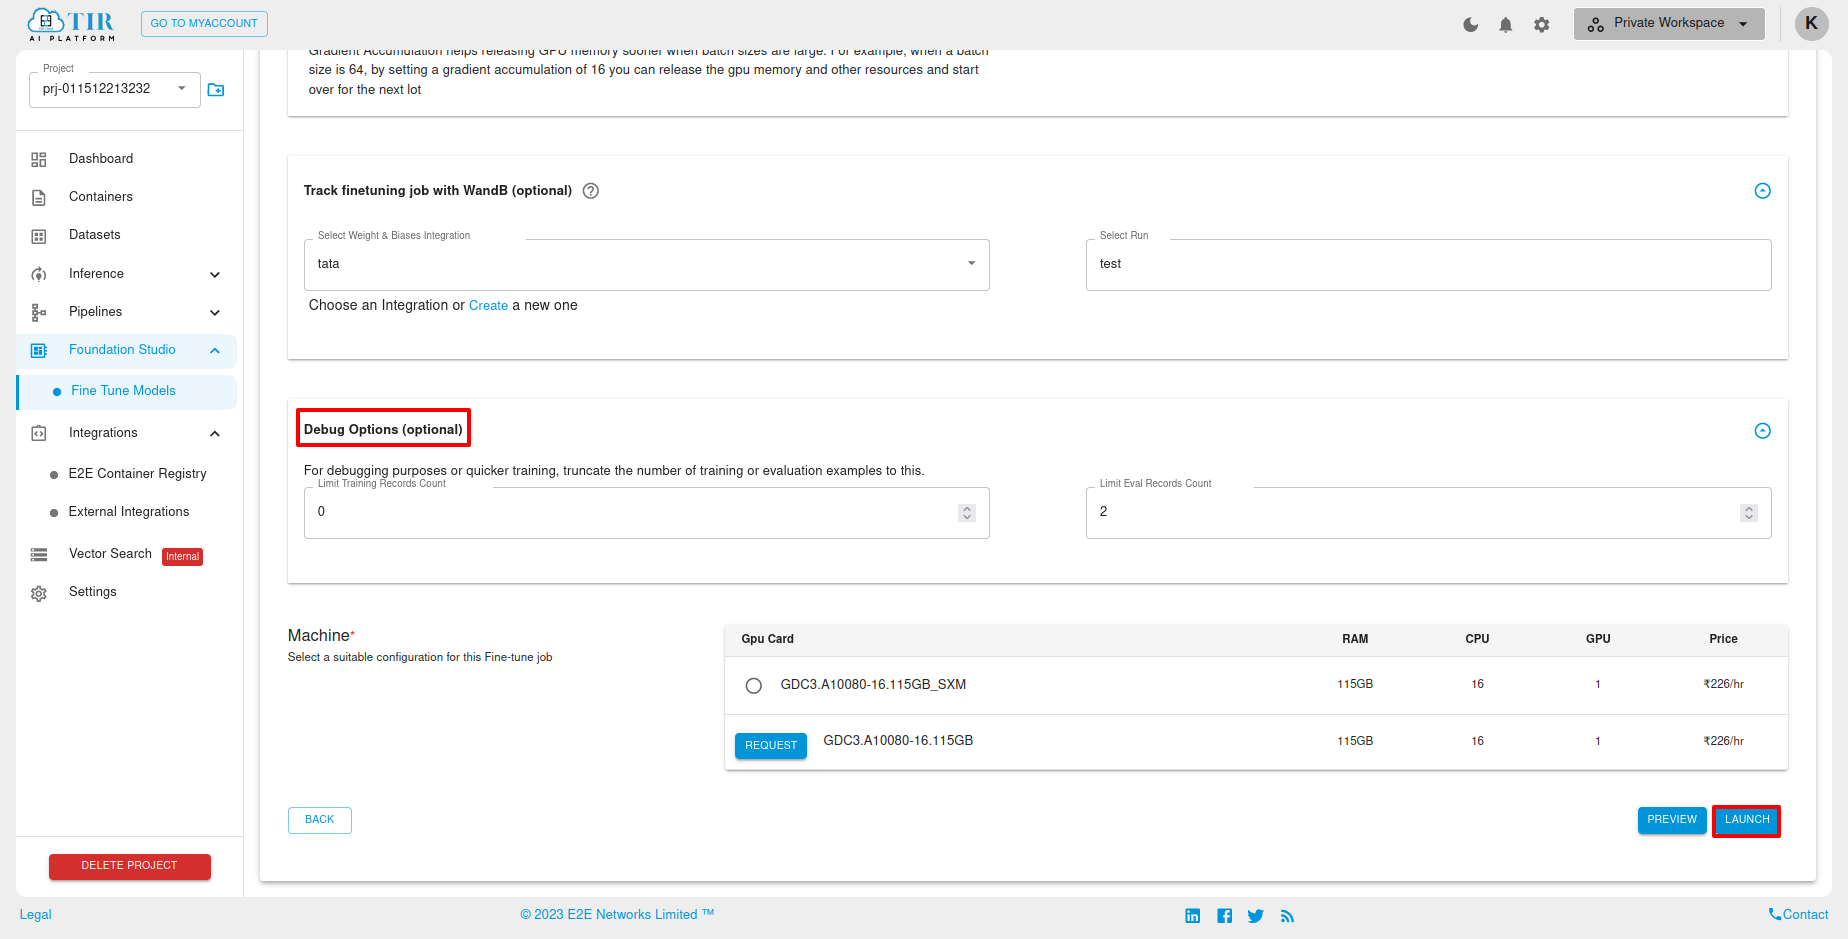
After completing the debug option, the user will have to select the machine and click on the ‘Launch’ button, to start/schedule the finetuning job
Viewing your Job parameters and Finetuned models ?
On completion of job, a Fine-Tuned model will be created and will be shown in models section in lower section of the page. This finetuned model repo will contain all checks-points of model training as well as adapters built during training. Users if they desire, can also directly go to model repo page under inference to view it.
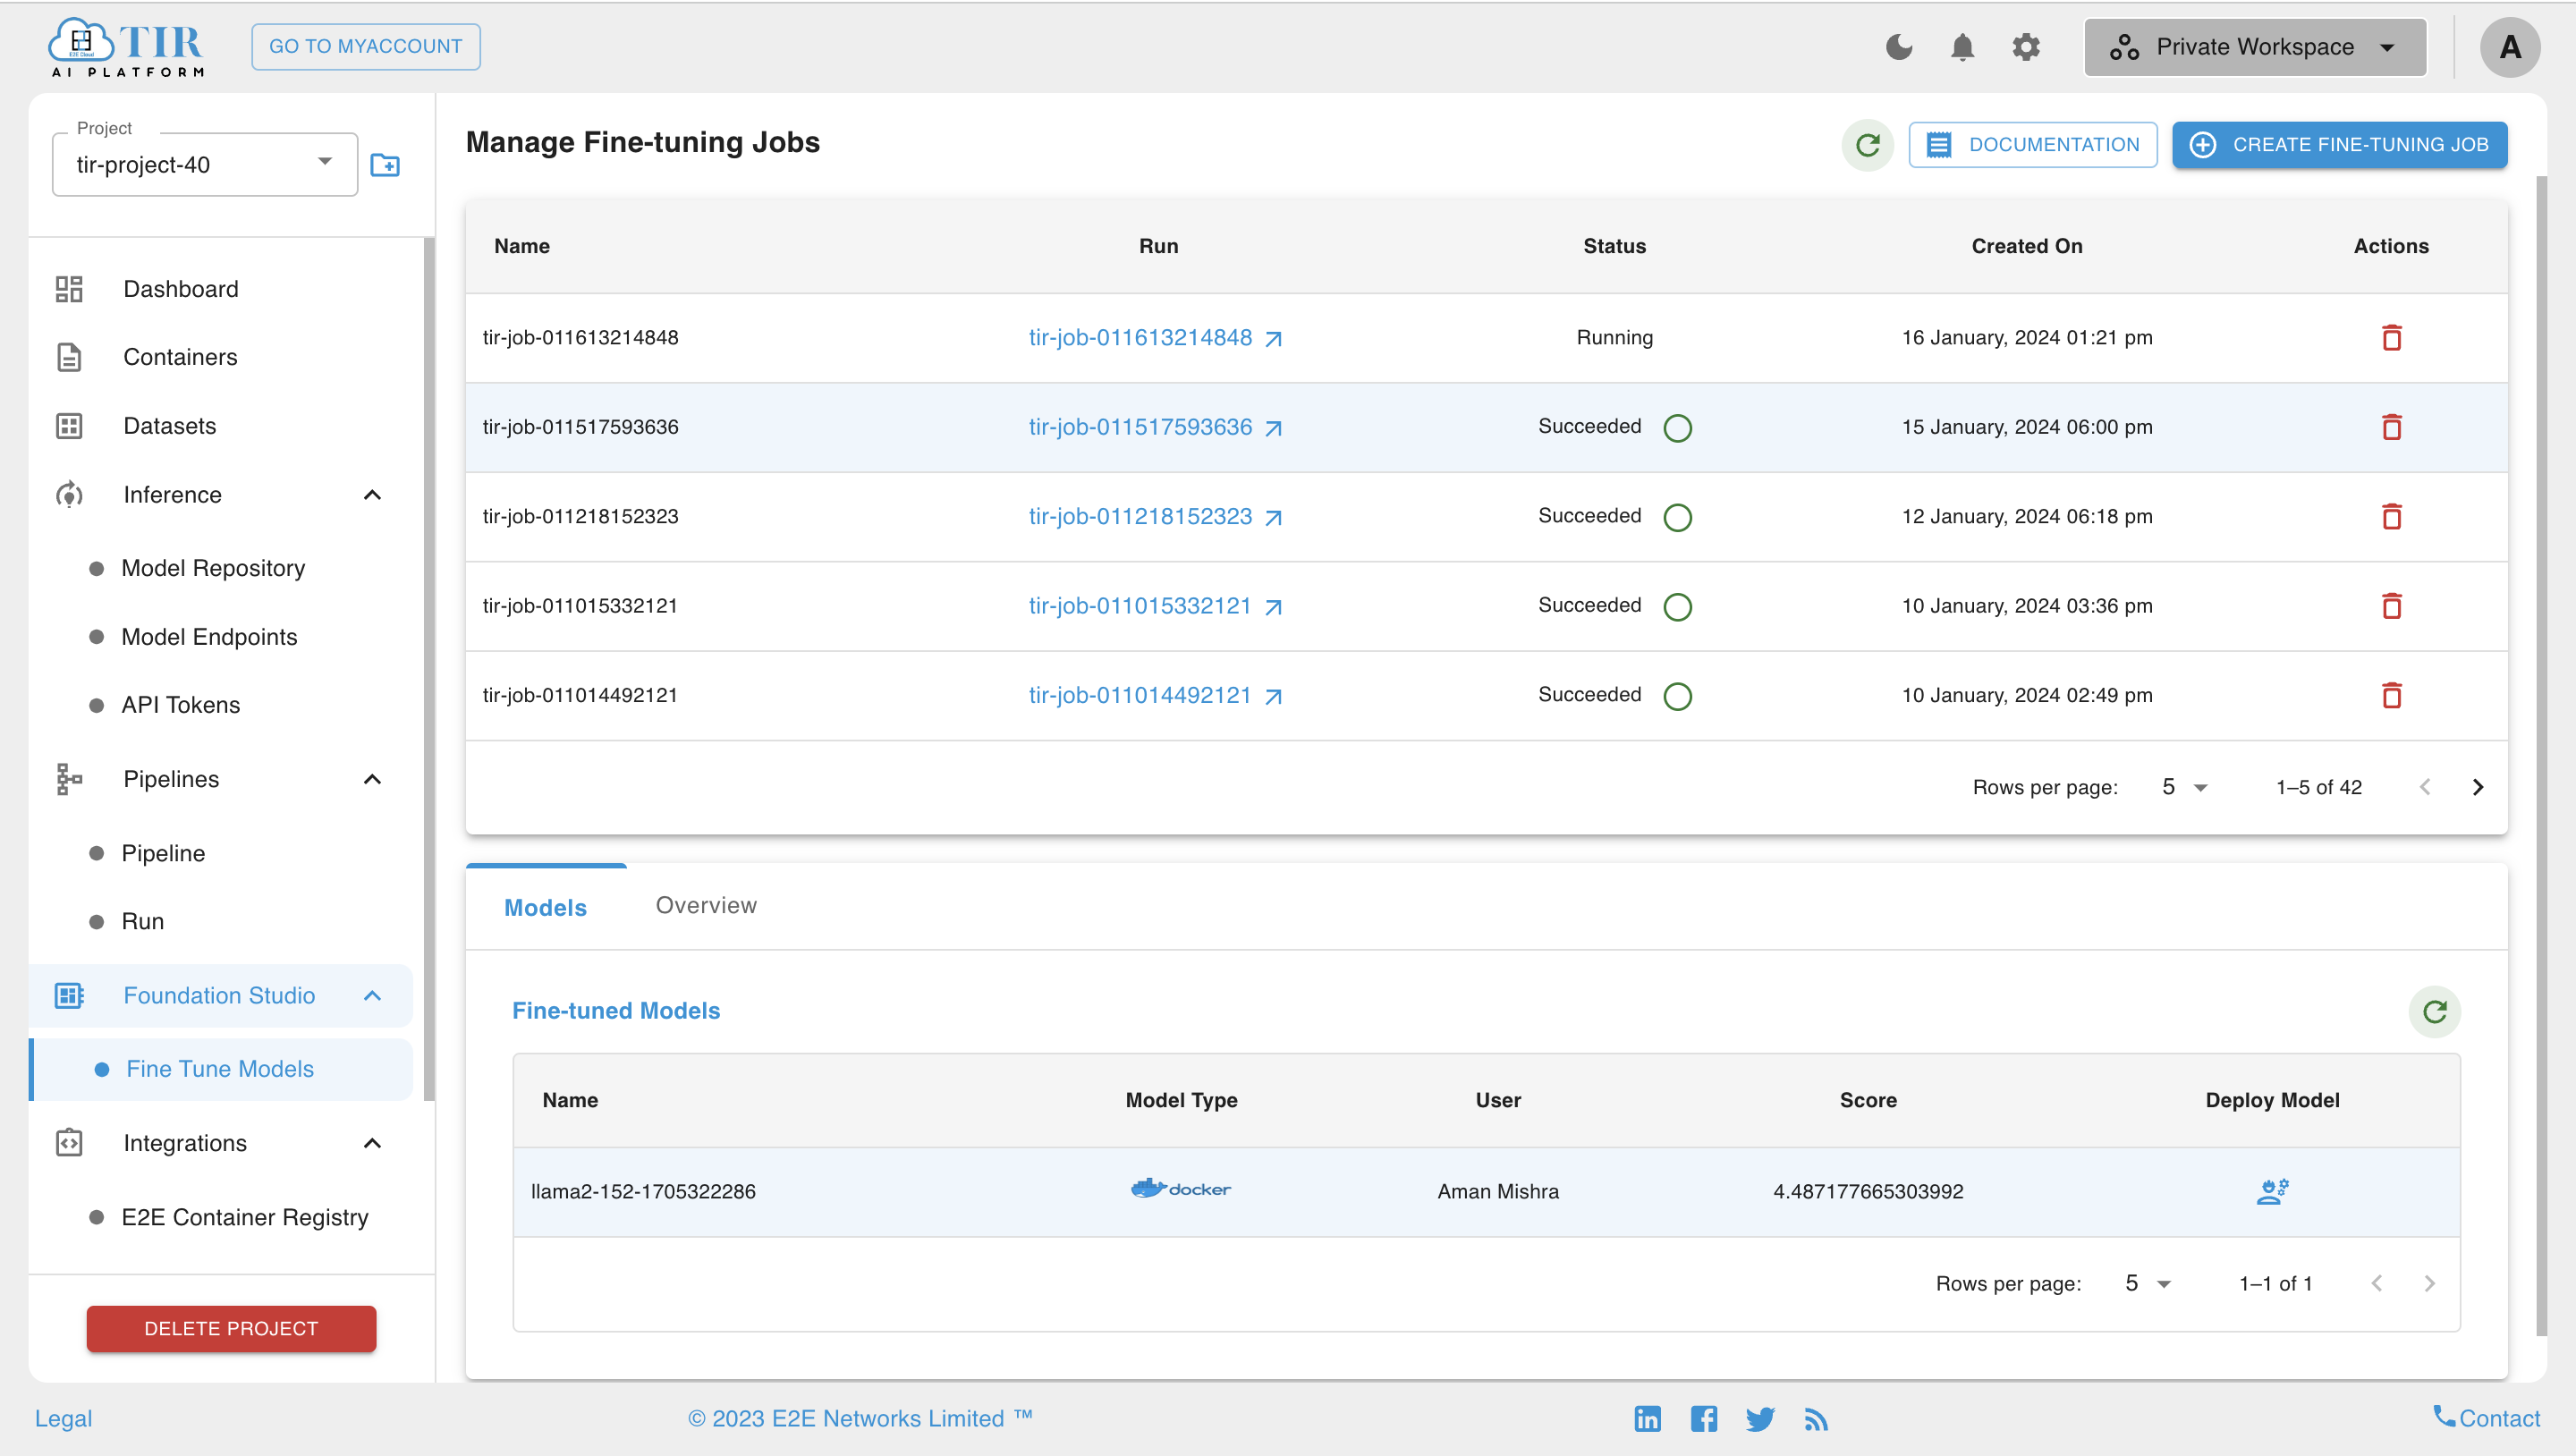
If desired the user can view job parameter details in overview section of the job as shown below.
